
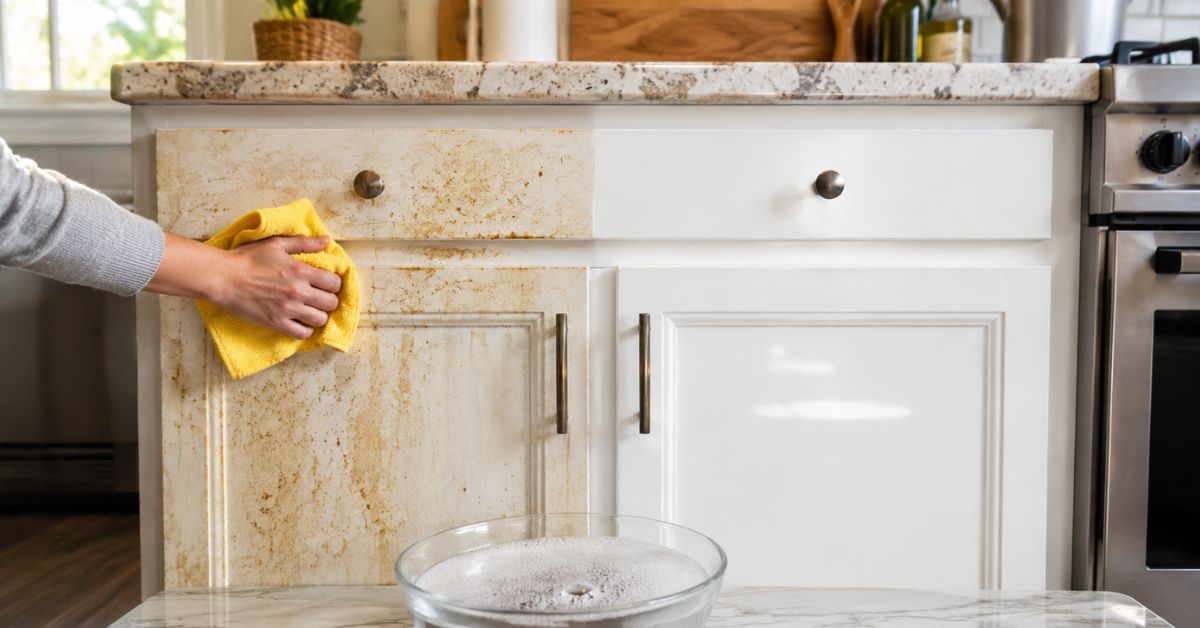
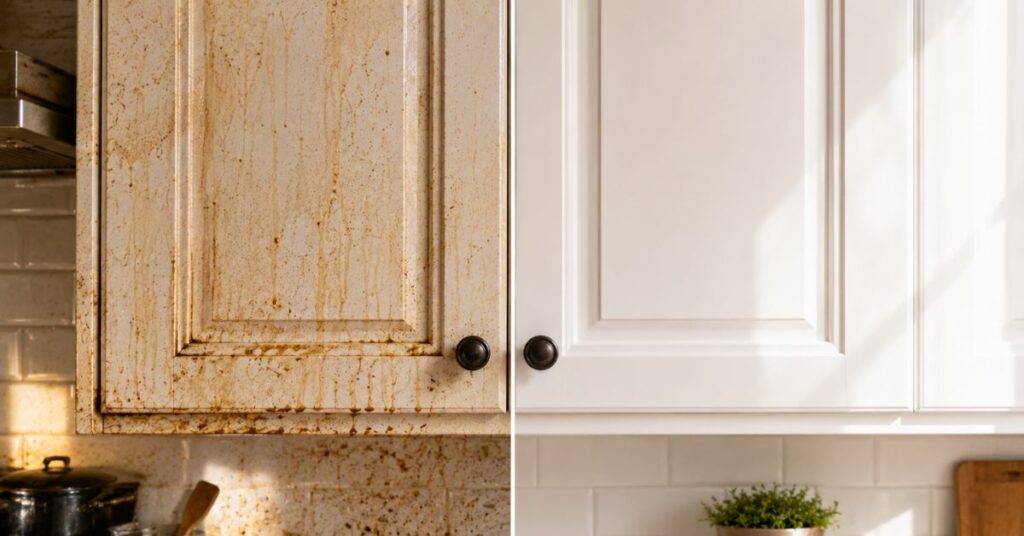
Have you ever wiped your kitchen cabinets only to discover that they still feel sticky? If so, you’re not alone. One of the most common kitchen cleaning problems is grease buildup. Every time you fry food, cook with oil, or boil water, tiny grease particles float through the air and slowly settle on cabinet doors, handles, and corners. Over time, these particles mix with dust, making cabinets look dull and feel unpleasant.
The good news is that learning how to remove grease from kitchen cabinets doesn’t require expensive products or professional cleaning services. With the right techniques and a little patience, you can restore your cabinets to a clean, fresh appearance while protecting their finish.
This guide explains safe cleaning methods for painted, wooden, laminate, and MDF cabinets. You’ll also learn what mistakes to avoid, which homemade cleaners actually work, and how to prevent grease from building up again.
How to Remove Grease From Kitchen Cabinets?
Before cleaning, it helps to understand why grease sticks so stubbornly.
Whenever food cooks, especially fried foods, cooking oils become tiny airborne droplets. These droplets travel around the kitchen before settling on nearby surfaces. Cabinets located above or beside the stove collect the most grease because they’re closest to the source.
At first, the grease layer is almost invisible. As days and weeks pass, it traps dust, flour, smoke particles, and everyday dirt. Eventually, the surface becomes sticky, darker than the surrounding areas, and much harder to clean.
Several factors make grease build up faster:
- Frequent frying or deep-frying
- Poor kitchen ventilation
- Not using the range hood while cooking
- Skipping regular cabinet cleaning
- High humidity inside the kitchen
Understanding these causes helps you prevent future buildup instead of constantly dealing with stubborn grease.
What You’ll Need Before You Start
One of the biggest mistakes homeowners make is grabbing the strongest cleaner they can find. Harsh chemicals may remove grease, but they can also damage cabinet finishes, remove protective coatings, or discolor painted surfaces.
Instead, gather a few gentle cleaning supplies.
Basic Cleaning Supplies
- Microfiber cloths
- Soft sponge
- Warm water
- Dish soap
- Spray bottle
- Soft toothbrush
- Dry towel
- Small bowl
- Rubber gloves (optional)
If you’re planning to clean greasy kitchen cabinets, these simple tools are usually enough for everyday grease.
Check Your Cabinet Material First
Not every cabinet should be cleaned the same way. Using the wrong cleaner can permanently damage the finish.
Solid Wood Cabinets
Wood cabinets are durable but can absorb too much moisture. Always use a damp, not soaking wet, cloth, and dry the surface immediately after cleaning.
Painted Cabinets
Painted cabinets scratch more easily than wood. Avoid abrasive scrubbers and harsh powders.
Laminate Cabinets
Laminate surfaces are generally easy to clean but should never be scrubbed with steel wool or rough brushes.
MDF Cabinets
Medium-density fiberboard (MDF) is sensitive to water. Excess moisture may cause swelling or peeling around the edges.
Taking one minute to identify your cabinet material can save you from expensive repairs later.
The Best Way to Clean Kitchen Cabinets With Dish Soap
For most kitchens, dish soap is still the best way to clean kitchen cabinets because it is designed to break down cooking oils safely.
Step 1: Mix the Solution
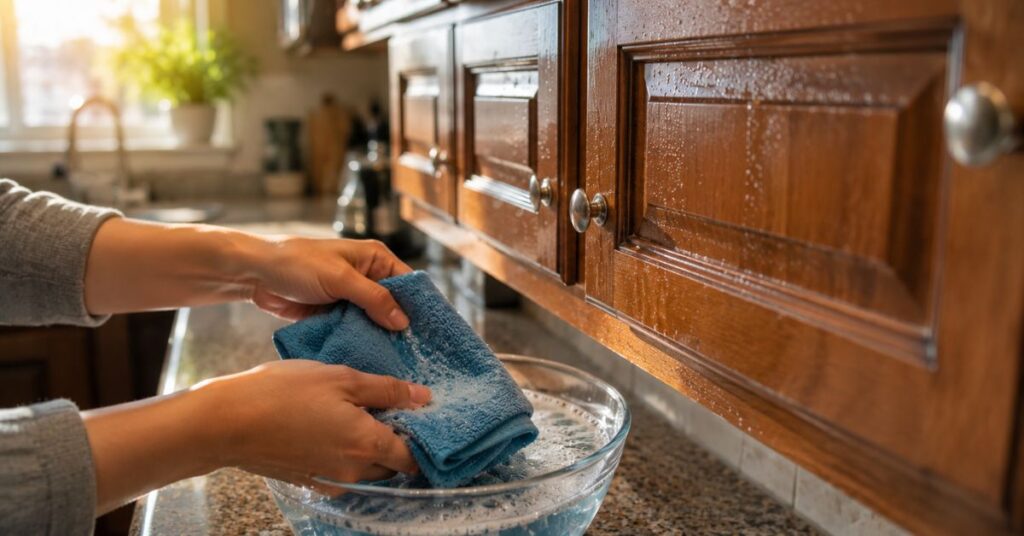
Fill a bowl with warm (not hot) water.
Add a few drops of grease-cutting dish soap.
Avoid using too much soap because excessive suds can leave residue behind.
Step 2: Wipe the Surface
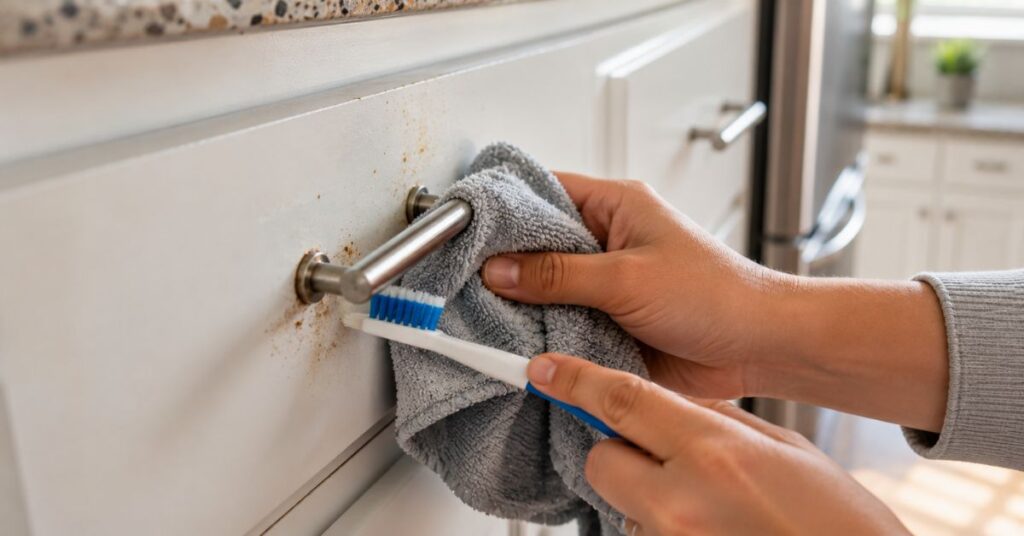
Dip a microfiber cloth into the solution.
Wring it out thoroughly until it’s only damp.
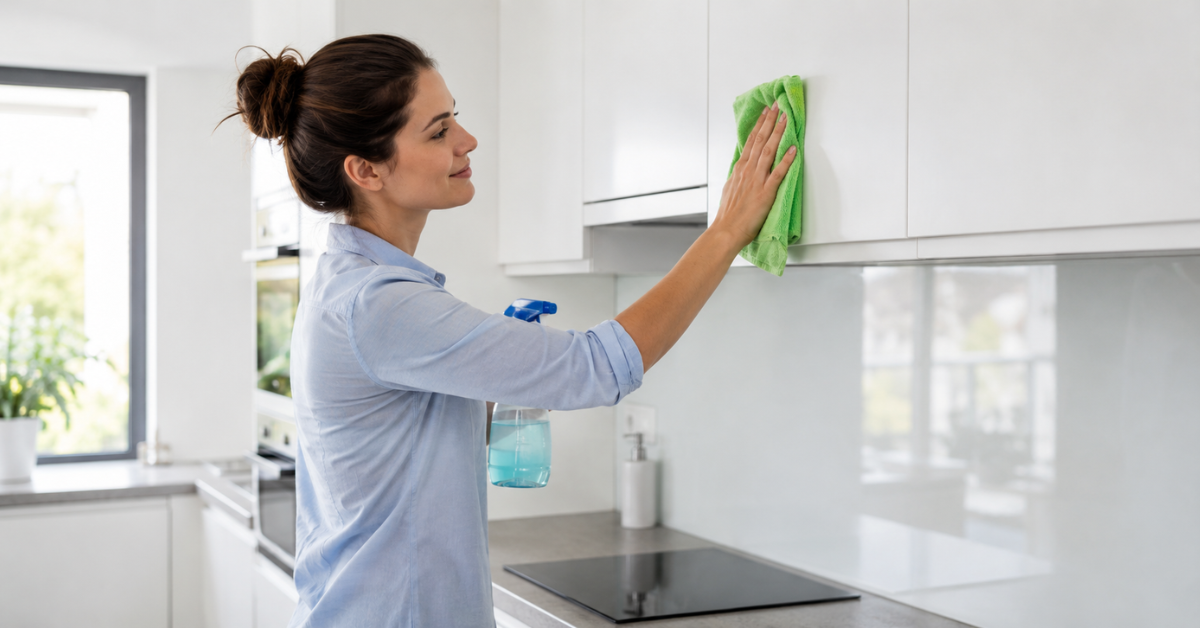
Wipe cabinets from top to bottom using gentle circular motions.
Pay extra attention to:
- Cabinet handles
- Corners
- Areas above the stove
- Cabinet edges
- Decorative grooves
These spots usually collect the thickest grease.
Step 3: Clean Small Crevices
Use a soft toothbrush to gently clean around hinges, decorative trim, and cabinet joints.
Avoid pressing too hard.
Step 4: Remove Soap Residue
Dampen another clean microfiber cloth with plain water.
Wipe away any remaining soap.
This step keeps cabinets from looking cloudy after drying.
Step 5: Dry Immediately
Use a clean, dry towel to remove all moisture.
Never allow water to sit on wooden cabinets for long periods.
How to Degrease Kitchen Cabinets Naturally
Many people prefer homemade cleaners because they’re inexpensive and contain fewer harsh ingredients.
However, not every DIY cleaning recipe you see online is suitable for every cabinet finish.
Here are two safer natural methods that work well for light to moderate grease.
Method 1: Warm Water and Dish Soap
This remains the safest natural solution for most cabinet materials.
It removes fresh grease without damaging paint or wood finishes.
Method 2: Baking Soda Paste (For Sticky Spots Only)
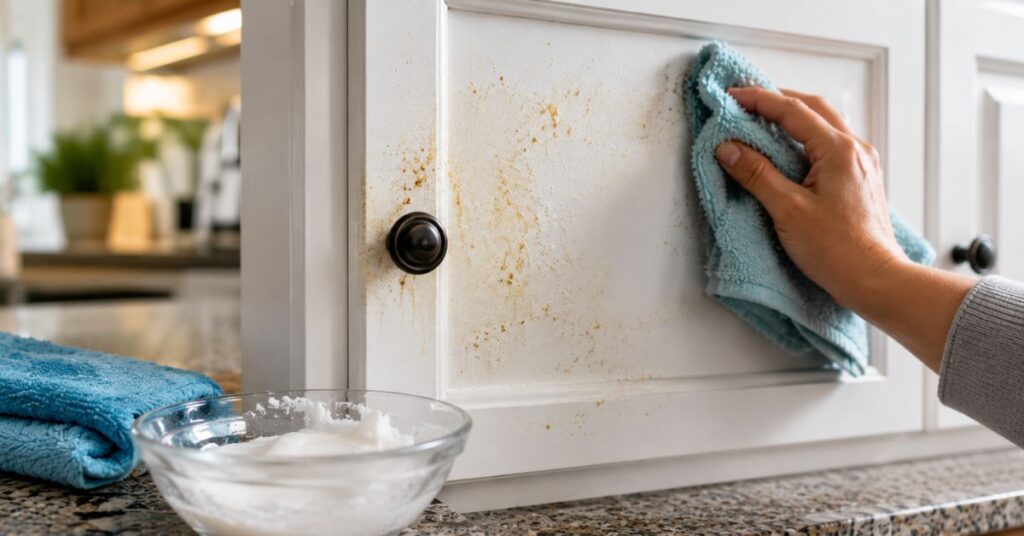
If grease has hardened into sticky patches, baking soda can help.
Mix:
- 2 tablespoons baking soda
- A small amount of water
Create a soft paste.
Apply it only to greasy areas.
Let it sit for two or three minutes before gently wiping it away with a damp microfiber cloth.
Do not scrub aggressively because baking soda is mildly abrasive.
Common Mistakes That Make Greasy Cabinets Worse
Many homeowners unknowingly damage their cabinets while trying to clean them.
Avoid these mistakes:
Using bleach
Bleach can discolor painted finishes and damage protective coatings.
Using steel wool
Steel wool leaves permanent scratches.
Spraying cleaner directly onto cabinets
Always spray onto the cloth first.
Soaking wooden cabinets
Too much moisture can warp wood over time.
Ignoring grease for months
Old grease becomes much harder to remove than fresh buildup.
Cleaning regularly takes only a few minutes and prevents hours of scrubbing later.
When Is a Stronger Kitchen Cabinet Grease Remover Needed?
Sometimes grease has been building up for years.
If dish soap no longer works, you may need a dedicated kitchen cabinet grease remover that is specifically labeled as safe for your cabinet material.
Before using any commercial product:
- Read the manufacturer’s instructions.
- Test it on a hidden area first.
- Avoid mixing different cleaning chemicals.
- Rinse away residue if the label recommends it.
A product designed for grease can save time, but using the wrong one may permanently damage cabinet finishes.
How to Remove Sticky Grease From Kitchen Cabinets
Fresh grease usually wipes away with warm water and dish soap. Sticky grease, however, is a different story. It forms after layers of cooking oil mix with dust, smoke, and everyday kitchen dirt over months or even years. This creates a stubborn film that feels tacky and often looks darker than the surrounding cabinet surface.
The key is to soften the grease before trying to remove it. Scrubbing aggressively rarely works and can leave scratches, dull the finish, or even remove paint.
Step 1: Start With Warm Soapy Water
Even if you’ve tried this before, begin with the gentlest method. Wet a microfiber cloth with warm water mixed with a few drops of dish soap, then place the cloth over the greasy area for about one minute. This helps soften the buildup so it releases more easily.
Afterward, wipe in gentle circular motions. You may be surprised how much grease comes off after letting the solution sit briefly.
Step 2: Repeat Instead of Scrubbing Hard
Many people make the mistake of trying to clean everything in one pass. Sticky grease usually comes off layer by layer.
Instead of applying more force, repeat the cleaning process several times. This protects the cabinet finish while gradually removing years of buildup.
Step 3: Treat Small Areas Separately
Cabinet handles, corners, decorative trim, and edges often collect the thickest grease. Use a soft toothbrush or a cotton swab to clean these hard-to-reach areas.
Work gently and avoid using sharp objects that could chip paint or scratch wood.
How to Clean Greasy Kitchen Cabinets by Material
One cleaning method doesn’t work for every cabinet. Knowing your cabinet type helps you choose the safest approach.
Wooden Cabinets
Wood cabinets add warmth to a kitchen, but they also require extra care. Excess water can seep into the wood grain and cause swelling, staining, or finish damage.
To clean wooden cabinets:
- Use a damp microfiber cloth instead of a wet one.
- Wipe with the direction of the wood grain whenever possible.
- Dry immediately with a soft towel.
- Avoid soaking corners or joints where moisture can collect.
For finished wood cabinets, less water is almost always better.
Painted Cabinets
Painted cabinets brighten a kitchen but are easier to scratch than natural wood.
To clean them safely:
- Choose a soft microfiber cloth.
- Avoid abrasive powders.
- Never use steel wool.
- Clean gently around edges where paint may already be thin.
If you notice chipped paint, avoid excessive rubbing in that area until repairs are made.
Laminate Cabinets
Laminate is one of the easiest materials to maintain because it doesn’t absorb grease like unfinished wood.
For laminate cabinets:
- Clean with warm soapy water.
- Wipe with a soft cloth.
- Dry thoroughly.
- Avoid harsh solvents that may dull the finish.
Most everyday grease comes off laminate without much effort.
White Cabinets
White cabinets show grease faster than darker colors. Yellowish stains around handles and near the stove are especially common.
The safest approach is frequent light cleaning rather than waiting until stains become noticeable.
Regular maintenance helps white cabinets stay bright without requiring aggressive cleaning later.
Does Vinegar Remove Kitchen Grease?
Many online guides recommend vinegar for almost every cleaning task, but the truth is more balanced.
White vinegar can help dissolve light grease because of its mild acidity. However, it isn’t the best solution for every cabinet material.
Vinegar may be suitable for:
- Laminate cabinets
- Some painted finishes (after spot testing)
- Light grease buildup
Avoid vinegar on:
- Unsealed wood
- Waxed wood finishes
- Cabinets with damaged protective coatings
- Natural stone surfaces attached to cabinetry
If you decide to use vinegar, always dilute it with water and test it on a hidden area first.
For most kitchens, dish soap remains the safer and more reliable option.
Should You Use Baking Soda?
Baking soda is useful for stubborn grease, but only when used correctly.
It works because it provides gentle abrasion without being as harsh as commercial scouring powders.
However, even baking soda can scratch delicate finishes if scrubbed aggressively.
Best practices:
- Use only on stubborn sticky spots.
- Make a soft paste with water.
- Let it sit briefly.
- Wipe gently with a microfiber cloth.
- Rinse thoroughly afterward.
Think of baking soda as a spot treatment rather than an everyday cleaner.
Kitchen Cabinet Cleaning Tips That Save Time
Professional cleaners often spend less time cleaning because they follow a simple routine instead of waiting for grease to build up.
Here are practical kitchen cabinet cleaning tips that make a noticeable difference.
Clean While Cooking
If you notice oil splatters after frying, wipe them away once the cabinet has cooled. Fresh grease removes much more easily than grease that’s been sitting for weeks.
Keep Microfiber Cloths Handy
Store a clean microfiber cloth in your kitchen. A quick wipe every few days prevents heavy buildup and reduces the need for deep cleaning.
Don’t Forget Cabinet Handles
Handles are touched constantly with hands that may have cooking oil or food residue on them. Cleaning only the cabinet doors while ignoring the handles leaves behind hidden grease and germs.
Work From Top to Bottom
Always begin with the upper cabinets. As you clean, small amounts of dust or cleaner may fall downward. Working from the top prevents you from dirtying areas you’ve already cleaned.
Dry Every Surface
Moisture left behind can leave streaks or damage certain finishes over time. Finish each section with a clean, dry microfiber cloth.
How Often Should You Remove Grease From Kitchen Cabinets?
The answer depends on how often you cook.
If you cook every day:
Lightly wipe cabinet doors once a week and deep clean them every one to two months.
If you cook occasionally:
A quick wipe every two weeks and a thorough cleaning every three to four months is usually enough.
If you fry food frequently:
Cabinets near the stove may need weekly attention because airborne grease settles quickly in that area.
Creating a simple cleaning schedule prevents grease from becoming a difficult project later.
Signs It’s Time for a Deep Cabinet Cleaning
Sometimes grease builds up so gradually that you don’t notice it until it becomes obvious.
Watch for these signs:
- Cabinet doors feel sticky when touched.
- Dust clings to the surface even after wiping.
- Handles look darker than the surrounding area.
- White cabinets appear yellow near the stove.
- The kitchen has a lingering cooking odor despite being clean.
- You can see fingerprints even after wiping the surface.
If you notice several of these signs, it’s time for a thorough cleaning rather than a quick wipe-down.
Can Steam Cleaners Remove Cabinet Grease?
Steam cleaners are excellent for some household surfaces, but they are not always the best choice for kitchen cabinets.
High heat and moisture can loosen paint, damage adhesives, or force water into wood joints. While some manufacturers approve steam cleaning for certain laminate cabinets, many do not.
Unless your cabinet manufacturer specifically recommends it, stick with gentle hand-cleaning methods. They may take a little longer, but they’re far safer for long-term cabinet care.
Choosing the Right Kitchen Cabinet Grease Remover
Sometimes grease has built up for so long that warm water and dish soap are no longer enough. In those situations, a commercial kitchen cabinet grease remover can save time and effort. The important thing is choosing a product that is safe for your cabinet material.
Before using any cleaner, read the manufacturer’s instructions and always test it on a hidden area such as the inside edge of a cabinet door. Wait a few minutes to make sure there is no discoloration or damage before cleaning larger surfaces.
Look for products that are specifically labeled as safe for kitchen cabinets or finished wood. Avoid cleaners that contain harsh solvents unless the cabinet manufacturer recommends them.
No matter which product you choose, remember that stronger doesn’t always mean better. The goal is to dissolve grease while protecting the cabinet finish.
DIY Grease Cleaning Solutions That Actually Work
The internet is full of homemade cleaning recipes, but not all of them are safe or effective. Some viral cleaning hacks can do more harm than good.
Here are a few DIY methods that are generally safe when used correctly.
Warm Water and Dish Soap
This remains the most reliable solution for everyday grease. Dish soap is designed to break down cooking oils, making it one of the safest options for regular cabinet cleaning.
For most homes, this simple mixture is all you’ll ever need.
Baking Soda Paste
When sticky grease refuses to come off, baking soda can provide extra cleaning power.
Mix a small amount of baking soda with water until it forms a soft paste. Apply it only to stubborn spots, let it sit for two or three minutes, then wipe gently with a damp microfiber cloth.
Avoid scrubbing aggressively because even mild abrasives can dull glossy finishes over time.
Warm Water for Final Rinsing
After using any cleaner, wipe the cabinets with a clean cloth dampened with plain water. This removes leftover residue that could attract dust or leave streaks.
Finish by drying every surface with a soft towel.
Cleaning Mistakes That Can Damage Kitchen Cabinets
Many cabinets are damaged during cleaning rather than everyday use. Avoiding a few common mistakes can extend the life of your cabinets for years.
Using Too Much Water
Wood and MDF cabinets do not respond well to excess moisture. Water can seep into seams, causing swelling, peeling, or warping.
A damp cloth is enough. There is rarely a need to soak the surface.
Scrubbing Too Hard
It is tempting to attack stubborn grease with force, but aggressive scrubbing often removes paint or scratches protective finishes.
Patience is far more effective than pressure.
Using Abrasive Tools
Steel wool, hard-bristle brushes, and scouring pads may remove grease, but they can also leave permanent scratches.
Soft microfiber cloths and non-abrasive sponges are much safer choices.
Mixing Cleaning Products
Never mix household cleaners unless the manufacturer clearly states it is safe. Combining certain chemicals can produce dangerous fumes or reduce cleaning effectiveness.
Stick to one cleaning product at a time.
Forgetting to Dry Cabinets
Even if the cabinets look clean, leaving moisture behind can cause streaks and damage over time.
A dry microfiber cloth should always be your final step.
How to Prevent Grease From Building Up Again
The easiest way to remove grease from kitchen cabinets is to stop heavy buildup before it starts.
Simple habits make a huge difference.
Use Your Range Hood Every Time You Cook
A range hood captures steam, smoke, and airborne grease before they settle on cabinets.
Even running it for an extra ten minutes after cooking can help reduce grease accumulation.
Improve Kitchen Ventilation
If your kitchen has windows, open one while cooking whenever possible. Better airflow helps reduce moisture and oily particles in the air.
Wipe Cabinets Weekly
You don’t need a deep cleaning every week.
A quick wipe with a damp microfiber cloth takes only a few minutes and prevents grease from hardening.
Clean Cooking Splatters Immediately
Fresh oil wipes away easily. Once it dries, it begins attracting dust and becomes much harder to remove.
Taking thirty seconds after cooking can save hours of scrubbing later.
Wash Microfiber Cloths Regularly
Dirty cloths simply spread grease from one surface to another.
Wash reusable cloths after each major cleaning session so they continue to work effectively.
A Simple Kitchen Cabinet Cleaning Schedule
Following a routine keeps cabinets looking fresh without requiring long cleaning sessions.
Every Day
- Wipe visible cooking splatters near the stove.
- Dry any water that drips onto cabinets.
Every Week
- Wipe cabinet doors with warm water and dish soap.
- Clean handles and frequently touched areas.
Every Month
- Inspect corners and decorative trim.
- Clean areas above the stove where grease collects fastest.
Every Three to Four Months
- Perform a full deep cleaning.
- Remove sticky grease from hidden areas.
- Check hinges and cabinet edges for trapped dirt.
A simple schedule is easier to maintain than waiting until grease becomes obvious.
Expert Housekeeping Tips for Cleaner Kitchen Cabinets
Professional housekeepers focus on prevention rather than constant deep cleaning. These small habits can make a noticeable difference.
- Always cook with lids when possible to reduce grease splatter.
- Replace your range hood filter according to the manufacturer’s recommendations.
- Dust cabinet tops regularly, as grease often mixes with dust in these hidden areas.
- Use separate cloths for cleaning and drying to avoid streaks.
- Never ignore cabinet edges near the stove, where grease tends to accumulate first.
- Clean spills as soon as they happen instead of waiting until the end of the week.
These simple routines keep your kitchen cleaner while reducing the need for heavy scrubbing.
FAQs
What is the best way to clean kitchen cabinets?
For most cabinet materials, warm water mixed with a few drops of grease-cutting dish soap is the safest and most effective everyday cleaner. Use a soft microfiber cloth and dry the surface immediately after cleaning.
How often should I remove grease from kitchen cabinets?
Light cleaning once a week and a deep cleaning every one to three months works well for most households. If you fry food frequently, clean cabinets near the stove more often.
Can I use vinegar on wooden cabinets?
Vinegar should be used with caution. It may be suitable for some finished surfaces when diluted and spot-tested, but it is not recommended for unsealed or waxed wood because it can affect the finish.
Is baking soda safe for kitchen cabinets?
Yes, but only for stubborn sticky spots. Make a soft paste, apply gently, and avoid aggressive scrubbing to prevent scratches.
Why do my cabinets still feel sticky after cleaning?
This usually means there are still layers of old grease on the surface or soap residue has been left behind. Repeat the cleaning process gently and rinse with clean water before drying thoroughly.
Conclusion
Learning how to remove grease from kitchen cabinets doesn’t have to be difficult. In most cases, regular maintenance with warm water, a grease-cutting dish soap, and a microfiber cloth is all that’s needed to keep cabinets clean and looking their best. For tougher buildup, gentle methods such as a baking soda paste can help without damaging the finish.
The most important lesson is that prevention is easier than restoration. Wiping away fresh splatters, using your range hood while cooking, and following a simple cleaning schedule can stop grease from becoming a stubborn problem in the first place.
With the right tools, safe techniques, and consistent care, your kitchen cabinets can stay fresh, clean, and attractive for years to come.
- Why Your Towels Smell Even After Washing In 2026
 There is nothing better than wrapping yourself in a soft, fresh-smelling towel… Read more: Why Your Towels Smell Even After Washing In 2026
 - Why You Should Wash Your Bananas As Soon As You Get Home
 Why Washing Bananas Matters More Than You Think Bananas are one of… Read more: Why You Should Wash Your Bananas As Soon As You Get Home
 - What Is Dry Cleaning? Here’s When It’s Actually Necessary, According to the Experts
 What You’ll Learn Have you ever looked at a clothing label that… Read more: What Is Dry Cleaning? Here’s When It’s Actually Necessary, According to the Experts
 - Wednesday Motivational Quotes: 120+ Inspiring Quotes to Beat the Midweek Slump
 Wednesday can feel like the longest day of the week. Monday and… Read more: Wednesday Motivational Quotes: 120+ Inspiring Quotes to Beat the Midweek Slump
 - Top 10 Uses of Convex Mirror in Your Daily Life (2026 Guide)
 Uses of Convex Mirror in Daily Life. Have you ever noticed how… Read more: Top 10 Uses of Convex Mirror in Your Daily Life (2026 Guide)
 - The Ultimate Hotel Room Cleaning Guide: Step-by-Step Housekeeping Process
 Hotel Room Cleaning Guide: A spotless hotel room is one of the… Read more: The Ultimate Hotel Room Cleaning Guide: Step-by-Step Housekeeping Process
 - The Ultimate Guide: How to Load a Washing Machine the Right Way for Cleaner Clothes
 How to Load a Washing Machine: Laundry may seem like one of… Read more: The Ultimate Guide: How to Load a Washing Machine the Right Way for Cleaner Clothes
 - The Ultimate Guide to Vinegar Cleaning Mistakes: What You Should Never Clean With Vinegar
 Vinegar has earned a reputation as a powerful, eco-friendly cleaner. From removing… Read more: The Ultimate Guide to Vinegar Cleaning Mistakes: What You Should Never Clean With Vinegar
 - Self-Motivation Quotes: 10 Powerful Lines to Inspire Your Life
 Self motivation quotes. In today’s fast-paced world, staying motivated is not always… Read more: Self-Motivation Quotes: 10 Powerful Lines to Inspire Your Life
 - Red Velvet Cake: 7 Easy Steps to Make the Most Delicious Bakery-Style Cake at Home
 What Makes This Classic Dessert So Special Red velvet cake is one… Read more: Red Velvet Cake: 7 Easy Steps to Make the Most Delicious Bakery-Style Cake at Home





Leave a Reply