
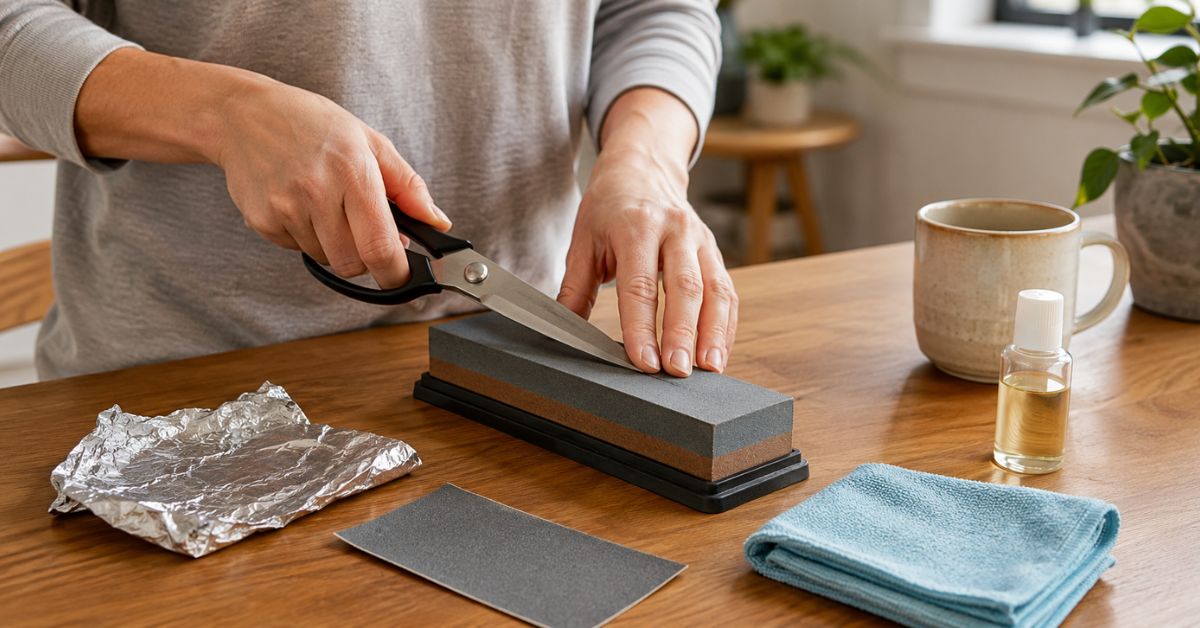
Dull scissors can make even the simplest household task frustrating. Whether you are cutting paper, fabric, food packaging, or craft materials, blunt blades tear instead of making a clean cut. Many people throw away old scissors and buy new ones, but in most cases, you can restore their sharpness at home with a few simple tools.
Learning how to Sharpen Scissors at Home is a useful skill for every homeowner. It saves money, extends the life of your scissors, and keeps your household tools working properly. The best part is that you do not always need expensive sharpening equipment. Common items like aluminum foil, sandpaper, and a ceramic mug can often improve the cutting edge when used correctly.
In this guide, I will share safe and practical methods that actually work. These techniques are suitable for most household scissors, kitchen scissors, and craft scissors. I will also explain which methods are best for different types of blades and when professional sharpening is the safer choice.
Why Scissors Become Dull
Scissors become dull because their cutting edges gradually wear down with repeated use. Every time the blades cut through paper, fabric, cardboard, plastic, or other materials, a tiny amount of metal is removed from the edge. Over time, this creates a rounded or uneven blade that no longer cuts cleanly.
One of the biggest causes of dull scissors is cutting the wrong materials. Household scissors are designed for light tasks, but many people use them to cut thick cardboard, plastic packaging, wire, or even tape. These materials put extra pressure on the blades and can damage the cutting edge quickly.
Moisture is another common problem. Kitchen scissors and bathroom scissors are often exposed to water, soap, and humidity. If they are not dried properly, rust can form along the blades. Rust weakens the metal and makes the scissors feel rough or stiff when opening and closing.
Poor maintenance also contributes to dullness. Dust, glue, hair, and fabric fibers can collect around the pivot screw and between the blades. This buildup prevents the blades from meeting correctly, so even sharp scissors may seem dull because they are not aligned properly.
Here are the most common reasons scissors lose their sharpness:
- Cutting thick or hard materials frequently
- Using paper scissors on fabric or cardboard
- Exposure to moisture and rust
- Dropping scissors on hard surfaces
- Lack of cleaning and lubrication
- Loose or misaligned pivot screws
Understanding why scissors become dull helps you choose the right sharpening method and avoid damaging them further.
Signs Your Scissors Need Sharpening
Before sharpening, it is important to recognize the signs that your scissors actually need attention. Sometimes the problem is not dull blades but dirt, rust, or loose alignment.
The most obvious sign is that the scissors tear material instead of cutting it cleanly. For example, paper may rip unevenly, or fabric may snag along the edges instead of producing a smooth cut.
Another common sign is increased resistance while cutting. If you have to apply more pressure than usual, the blades may have lost their sharp edge. Sharp scissors should glide through most household materials with minimal effort.
You may also notice that the blades slip past each other without cutting. This often happens when the pivot screw is loose, but it can also occur when the cutting edges are worn down.
Other signs include:
- Jagged or uneven cuts
- Paper folding or crumpling instead of cutting
- Fabric fraying along the cut line
- Visible nicks or dents on the blade edge
- Rust spots near the cutting edge
- A squeaking or stiff motion when opening and closing
If your scissors show one or more of these signs, it is a good time to learn how to Sharpen Scissors at Home before the blades become too damaged.
Can You Sharpen Scissors at Home?
Yes, you can sharpen many household scissors at home safely and effectively. Basic scissors made for paper, crafts, and kitchen tasks usually respond well to simple sharpening methods. However, the success of home sharpening depends on the condition of the blades and the type of scissors you are working with.
If the blades are only slightly dull, methods like aluminum foil or sandpaper can often restore a sharper edge. If the blades are heavily damaged, chipped, bent, or severely rusted, a sharpening stone or professional service may be necessary.
It is also important to understand that not all scissors should be sharpened at home. High-quality hair-cutting scissors, professional sewing shears, and specialty fabric scissors often have precise blade angles that require professional equipment. Attempting to sharpen them incorrectly can permanently damage the blades.
For most everyday household scissors, though, home sharpening is a practical and cost-effective solution. The key is to use gentle methods, maintain the correct blade angle, and avoid removing too much metal from the edge.
Method 1: Sharpen Scissors with Aluminum Foil
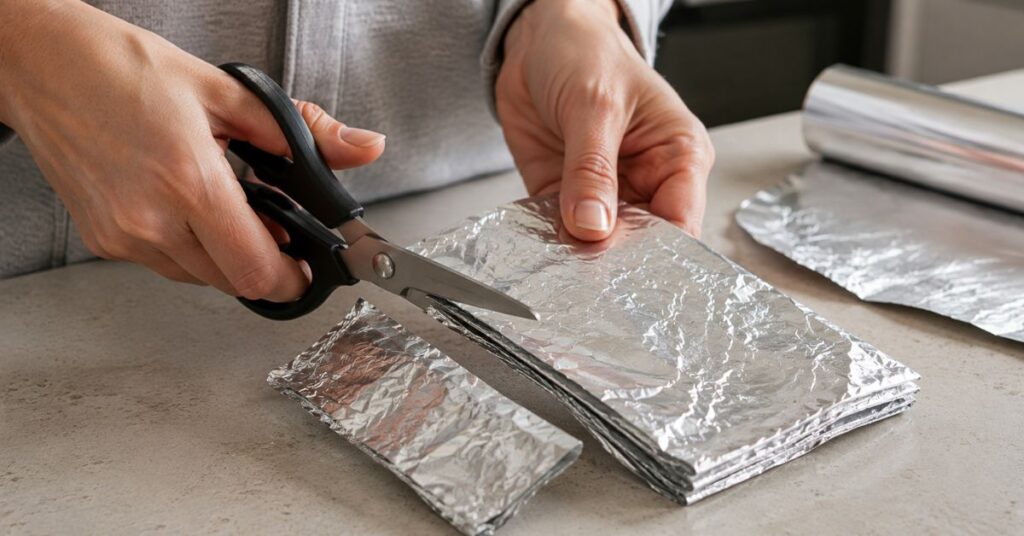
Aluminum foil is one of the easiest and safest ways to improve slightly dull scissors. While it does not create a professional-level sharp edge, it can help smooth minor imperfections and restore better cutting performance.
What You Need
- A sheet of aluminum foil
- Household scissors
- A clean cloth
Step-by-Step Instructions
- Tear off a piece of aluminum foil about 10 to 12 inches long.
- Fold the foil several times until it becomes a thick strip with multiple layers.
- Hold the folded foil firmly with one hand.
- Cut through the foil from one end to the other using the full length of the scissors.
- Repeat this cutting motion 10 to 15 times.
- Wipe the blades with a clean cloth to remove any tiny foil particles.
Why This Method Works
Cutting through multiple layers of aluminum foil creates slight friction against the blades. This friction can help smooth tiny rough spots along the cutting edge and improve the alignment of the blades. It is especially useful for scissors that are only mildly dull.
Best For
- Paper scissors
- Craft scissors
- Lightly dull household scissors
- Quick maintenance between deeper sharpening sessions
When Not to Use It
Do not rely on aluminum foil for heavily dull or damaged scissors. If the blades have visible nicks, chips, or severe rust, this method will not provide enough sharpening power.
Expert Tip
After using aluminum foil, test the scissors on a piece of paper. If the cut is still jagged, move on to a stronger method such as sandpaper or a sharpening stone.
Method 2: Sharpen Scissors with Sandpaper
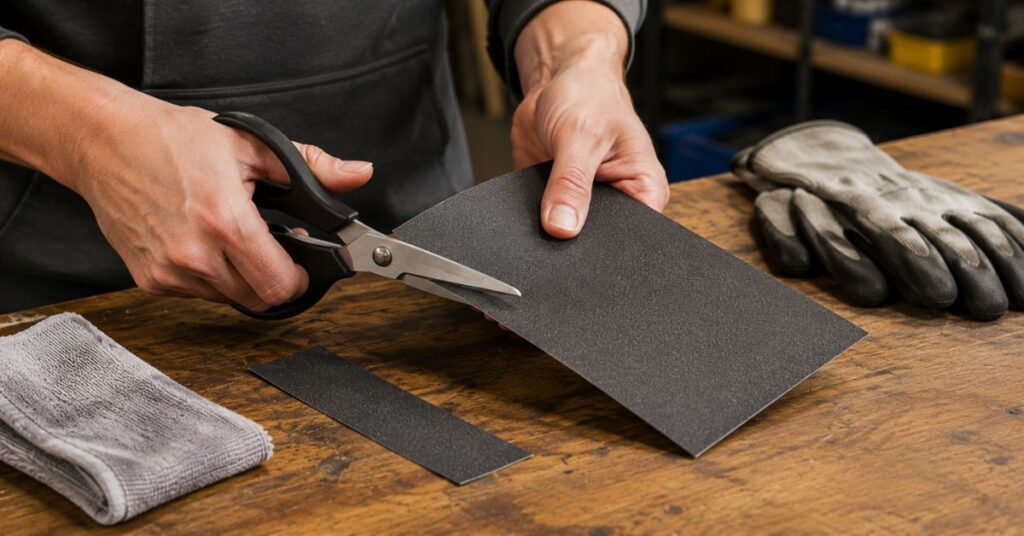
Sandpaper is one of the most effective home methods for restoring a sharper edge to dull scissors. Fine-grit sandpaper gently removes a small amount of metal from the blade, helping to create a cleaner cutting edge.
What You Need
- Fine-grit sandpaper (150 to 220 grit)
- Household scissors
- A clean cloth
- A few drops of oil (optional)
Step-by-Step Instructions
- Fold the sandpaper in half with the rough side facing outward.
- Hold the folded sandpaper firmly.
- Cut through the sandpaper using the full length of the blades.
- Repeat this process 10 to 20 times, depending on how dull the scissors are.
- Wipe the blades with a clean cloth to remove metal dust.
- Apply a tiny drop of oil to the pivot screw if the scissors feel stiff.
Why This Method Works
The abrasive surface of sandpaper gently grinds away worn metal and creates a sharper edge. Unlike aluminum foil, sandpaper can make a noticeable improvement on moderately dull scissors because it actually reshapes the blade edge slightly.
Best For
- Moderately dull household scissors
- Kitchen scissors
- Craft scissors
- Paper and cardboard scissors
When Not to Use It
Avoid coarse sandpaper, as it can remove too much metal and damage the blade edge. Fine-grit sandpaper is safer because it sharpens gradually and gives you better control.
Housekeeping Tip
Keep a small piece of fine-grit sandpaper in your household tool drawer. It can be used not only for scissors but also for maintaining other small metal tools around the home.
These first two methods are ideal for routine maintenance and lightly to moderately dull scissors. In the next part of this article, we will cover stronger sharpening methods, including using a sharpening stone, a ceramic mug, a manual scissor sharpener, and proper cleaning and lubrication techniques.
Method 3: Sharpen Scissors with a Sharpening Stone
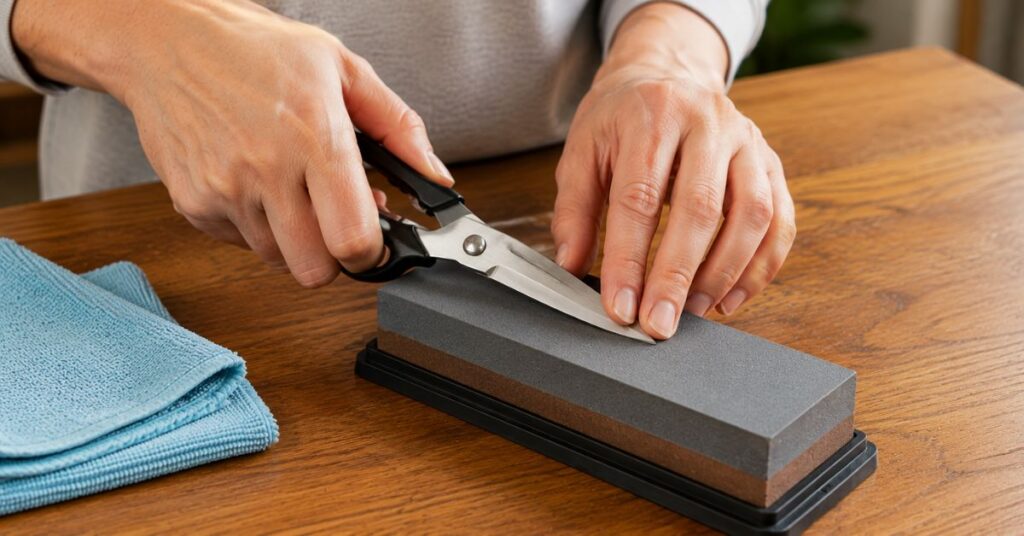
A sharpening stone is one of the most effective ways to restore dull scissors. Unlike quick household hacks, a sharpening stone actually reshapes the cutting edge when used correctly. It takes a little more time, but the results are usually much better and longer lasting.
This method works best for household scissors, kitchen scissors, and many craft scissors. However, expensive hair-cutting scissors or professional tailoring shears should usually be sharpened by a professional to avoid changing the blade angle.
What You’ll Need
- Fine or combination sharpening stone
- Clean towel
- Small bowl of water or honing oil (depending on the stone)
- Microfiber cloth
- Safety gloves (optional)
Step 1: Prepare the Stone
Read the manufacturer’s instructions before using the sharpening stone. Some stones require soaking in water for several minutes, while others use honing oil.
Place the stone on a flat, non-slip surface to keep it steady while sharpening.
Step 2: Separate the Blades (If Possible)
Many household scissors have a center screw that allows the blades to be separated. Working with individual blades makes sharpening easier and helps maintain the correct angle.
If your scissors cannot be taken apart safely, sharpen one blade at a time while keeping the scissors open.
Step 3: Match the Original Bevel
Place the beveled side of the blade flat against the sharpening stone. Try to match the factory edge instead of creating a new angle.
Maintaining the original bevel helps preserve the scissors’ cutting performance.
Step 4: Slide the Blade Across the Stone
Move the blade smoothly from the base toward the tip while keeping even pressure.
Repeat the motion 10 to 15 times before switching to the second blade.
Step 5: Remove Burrs
After sharpening both blades, lightly pass the flat side across the stone once or twice to remove any tiny burrs.
Step 6: Reassemble and Test
Reassemble the scissors if needed.
Cut a sheet of paper to check the sharpness. The scissors should cut cleanly without tearing or folding the paper.
Why This Method Works
A sharpening stone removes a very small amount of metal from the blade, restoring a fresh cutting edge. It provides more consistent results than temporary sharpening tricks.
Best For
- Kitchen scissors
- Household scissors
- Craft scissors
- Utility scissors
Avoid This Method When
Avoid sharpening pinking shears, serrated scissors, or expensive salon scissors unless you have experience or the manufacturer recommends home sharpening.
Housekeeping Tip
After sharpening, wipe the blades carefully to remove fine metal particles before using the scissors again.
Method 4: Use the Bottom of a Ceramic Mug
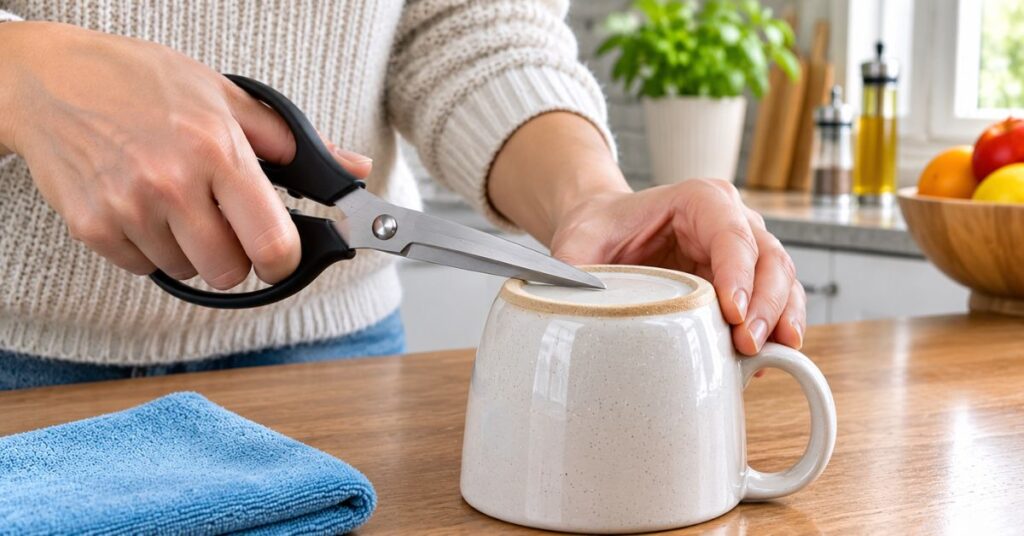
Many ceramic mugs have an unglazed ring on the bottom. This rough surface can provide light abrasion that helps refresh slightly dull scissors.
While this method will not restore badly worn blades, it can improve cutting performance when the scissors have only become slightly dull.
What You’ll Need
- Ceramic mug with an unglazed base
- Soft cloth
- Safety gloves (optional)
Step 1: Turn the Mug Upside Down
Place the mug upside down on a sturdy table.
The rough ceramic ring should be facing upward.
Step 2: Hold the Blade at the Correct Angle
Position one blade against the ceramic edge at approximately the same angle as the original cutting bevel.
Step 3: Draw the Blade Across the Ceramic
Pull the blade smoothly from the pivot toward the tip.
Repeat this motion around 10 times before sharpening the second blade.
Step 4: Clean the Blades
Use a soft cloth to wipe away any ceramic dust.
Step 5: Test the Scissors
Cut printer paper or thin cardboard.
If the scissors still struggle, move to a sharpening stone for better results.
Why This Method Works
The unglazed ceramic surface provides mild abrasion that can freshen a lightly worn cutting edge.
Best For
- Lightly dull household scissors
- Quick maintenance between full sharpenings
Not Recommended For
- Severely damaged blades
- High-end fabric scissors
- Professional hair scissors
Method 5: Screwdriver Technique (Cleaning and Blade Alignment Only)
The screwdriver technique is often misunderstood.
A screwdriver does not sharpen scissors.
Instead, it helps clean the cutting edges and may improve cutting performance if the blades have become slightly misaligned.
If your scissors suddenly stop cutting despite looking sharp, a loose center screw may be the real problem.
What You’ll Need
- Correct-size screwdriver
- Soft cloth
- Mild dish soap
- Warm water
Step 1: Check the Center Screw
Open and close the scissors several times.
If the blades wobble or separate while cutting, tighten the center screw carefully.
Avoid overtightening because the blades should still move smoothly.
Step 2: Clean Around the Pivot
Dust, adhesive, and small fibers often collect around the center screw.
Clean this area using warm soapy water and a soft cloth.
Step 3: Dry Completely
Moisture left around the pivot may lead to rust over time.
Dry every part thoroughly.
Why This Method Works
Proper blade alignment allows the cutting edges to meet correctly.
Many people think their scissors are dull when the real issue is simply a loose pivot screw.
Best For
- Loose scissors
- Sticky blades
- Scissors that pull material instead of cutting
Important Note
This method improves performance but does not create a new cutting edge.
Method 6: Use a Manual Scissor Sharpener
A manual scissor sharpener is one of the easiest options for beginners.
Most models contain pre-set sharpening guides that help maintain the correct blade angle without requiring special skills.
Step 1: Read the Instructions
Different sharpeners work differently.
Always follow the manufacturer’s instructions.
Step 2: Insert One Blade
Guide the blade into the sharpening slot.
Step 3: Pull Smoothly
Pull the blade through the sharpener using slow, even pressure.
Repeat only the recommended number of passes.
Step 4: Repeat for the Other Blade
Sharpen the second blade using the same technique.
Step 5: Test the Results
Cut several sheets of paper.
If the scissors still struggle, inspect the blades for damage rather than continuing to sharpen repeatedly.
Why This Method Works
The sharpening guides help maintain a consistent angle while removing only a small amount of metal.
Best For
- Beginners
- Household scissors
- Kitchen scissors
- Office scissors
Avoid Using On
- Hair-cutting scissors
- Serrated scissors
- Specialty fabric shears unless approved by the manufacturer
Method 7: Clean and Lubricate the Blades
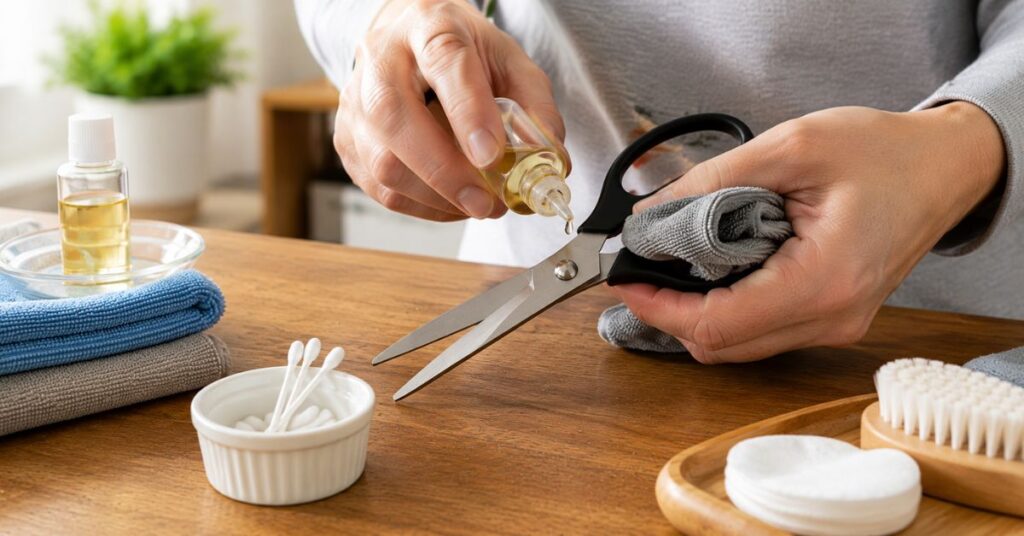
Sometimes scissors feel dull simply because dirt, tape residue, glue, or dried paint has built up along the blades.
Cleaning and lubricating the scissors may restore much smoother cutting even without sharpening.
What You’ll Need
- Warm water
- Mild dish soap
- Soft cloth
- Cotton swab
- Household mineral oil or sewing machine oil
Step 1: Wash the Blades
Clean both blades using warm water and a small amount of dish soap.
Remove all visible dirt and sticky residue.
Step 2: Dry Thoroughly
Use a microfiber cloth to remove all moisture.
Pay special attention to the pivot area.
Step 3: Apply One Drop of Oil
Place a single drop of mineral oil or sewing machine oil at the pivot.
Open and close the scissors several times so the oil spreads evenly.
Step 4: Wipe Away Excess Oil
Remove any remaining oil before storing the scissors.
Why This Method Works
Clean, lubricated blades move smoothly and reduce friction.
Although lubrication does not sharpen the cutting edge, it often makes scissors feel noticeably better during everyday use.
Best For
- Routine maintenance
- Sticky scissors
- Preventing rust
- Extending blade life
Expert Housekeeping Tip
Make blade cleaning part of your monthly home maintenance routine. Removing glue, tape adhesive, food residue, or moisture after each project helps keep scissors sharp longer and reduces the need for frequent sharpening.
Common Mistakes to Avoid When Sharpening Scissors
Sharpening scissors at home is easier than many people think, but a few common mistakes can damage the blades or make them perform worse. Avoiding these errors will help your scissors stay sharp and last for years.
Using the Wrong Sharpening Angle
Every pair of scissors is manufactured with a specific cutting angle. Changing that angle while sharpening can reduce cutting performance.
Whenever possible, follow the original bevel instead of trying to create a sharper-looking edge.
Sharpening Both Sides of the Blade
Most household scissors only have one beveled cutting edge. Sharpening the flat side unnecessarily can affect blade alignment and make cutting more difficult.
Applying Too Much Pressure
Pressing hard does not sharpen scissors faster.
Gentle, even strokes remove metal more evenly and reduce the risk of damaging the blade.
Ignoring Dirt and Adhesive
Glue, tape residue, dried paint, and food particles often make scissors feel dull.
Always clean the blades before deciding they need sharpening.
Using Household Hacks for Every Type of Scissors
Not every sharpening trick works for every pair of scissors.
Kitchen scissors, sewing scissors, craft scissors, and hair-cutting scissors all have different blade designs. Choose the method that matches the type of scissors you own.
Waiting Too Long
Many people wait until scissors barely cut anything before sharpening them.
Light maintenance is easier and removes less metal than restoring severely worn blades.
How to Sharpen Different Types of Scissors
Different scissors are designed for different jobs. Using the correct sharpening method protects the blades and gives better cutting performance.
Kitchen Scissors
Kitchen scissors often cut food packaging, herbs, poultry, and vegetables.
A sharpening stone or manual scissor sharpener usually works well for these scissors. Clean and sanitize the blades thoroughly before using them with food again.
Sewing Scissors
Fabric scissors are designed to make smooth, accurate cuts through cloth.
Use a sharpening stone or have expensive sewing shears professionally sharpened if they become very dull.
Never use fabric scissors to cut paper, cardboard, or plastic packaging because these materials dull the blades much faster.
Craft Scissors
Craft scissors frequently cut paper, foam, ribbon, tape, and lightweight plastic.
Because they often collect glue residue, cleaning the blades may improve performance before sharpening becomes necessary.
Office Scissors
Office scissors are generally used for paper and light cardboard.
Aluminum foil, fine-grit sandpaper, or a manual sharpener are usually suitable for routine maintenance.
Hair-Cutting Scissors
Professional haircutting scissors are precision tools.
Avoid using household sharpening methods on expensive salon scissors.
If they become dull, professional sharpening is the safest option because even a small change in blade angle can affect cutting performance.
Children’s Scissors
Children’s scissors are designed with safety in mind.
If they no longer cut well, replacing them is often a better choice than attempting to sharpen them.
How Often Should You Sharpen Scissors?
There is no single schedule that works for everyone. The right sharpening frequency depends on how often you use your scissors and what materials you cut.
For most households:
- Everyday kitchen scissors may need sharpening every 6 to 12 months.
- Office scissors often stay sharp for a year or longer.
- Sewing scissors should be sharpened whenever they begin snagging fabric.
- Craft scissors may require sharpening more frequently because they cut a wide variety of materials.
Instead of following a calendar, pay attention to performance. If the blades start folding paper, pulling fabric, or requiring extra force, it is probably time for maintenance.
Maintenance Tips to Keep Scissors Sharp Longer
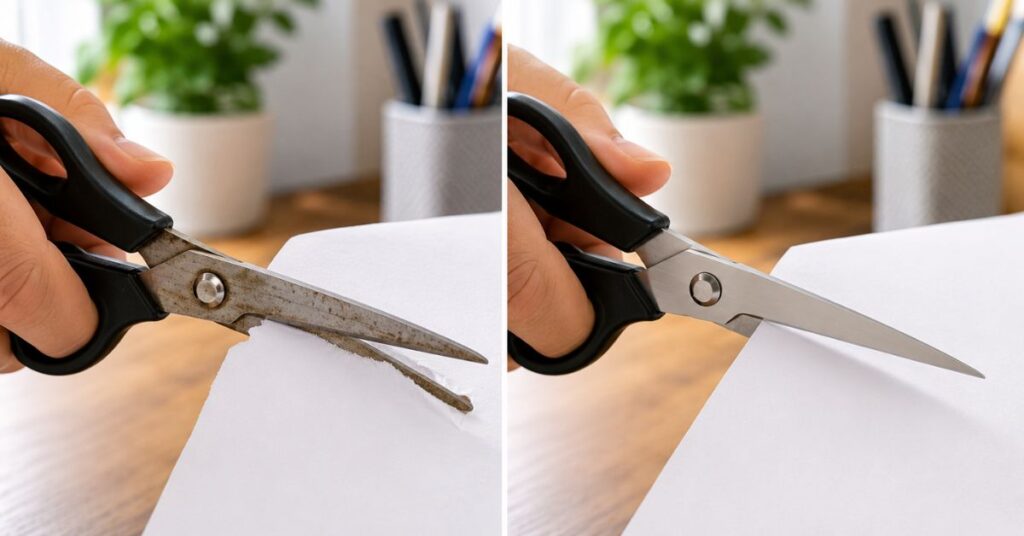
Proper care is just as important as sharpening. A few simple habits can extend the life of your scissors and reduce how often they need sharpening.
Always use scissors for their intended purpose. Kitchen scissors should stay in the kitchen, fabric scissors should only cut fabric, and craft scissors should be reserved for hobby projects.
After each use, wipe the blades with a clean cloth to remove dust, moisture, or adhesive.
Store scissors in a dry location. Humidity can lead to rust, especially around the pivot screw.
Apply one drop of mineral oil to the pivot every few months to keep the blades moving smoothly.
Avoid dropping scissors onto hard floors. Even a small impact can affect blade alignment.
Keep scissors closed when storing them in drawers to protect the cutting edges and reduce the risk of accidental injuries.
With regular cleaning and proper storage, most quality household scissors can provide reliable performance for many years.
FAQs
1. Does cutting aluminum foil really sharpen scissors?
Cutting folded aluminum foil can slightly improve the cutting performance of mildly dull scissors by smoothing tiny imperfections and cleaning the blade edges. However, it does not replace sharpening with a sharpening stone or a quality manual sharpener when the blades are significantly dull.
2. Is sandpaper safe for sharpening scissors?
Yes, fine-grit sandpaper can refresh lightly worn blades when used carefully. It works best as a maintenance method rather than for restoring heavily damaged cutting edges.
3. Can I sharpen stainless steel scissors at home?
Yes. Most stainless steel household scissors can be sharpened safely using a sharpening stone or a manual scissor sharpener, provided you follow the original blade angle.
4. Should I sharpen expensive hair-cutting scissors myself?
In most cases, no. Professional hair-cutting scissors have very precise cutting angles, and incorrect sharpening can permanently affect their performance. Professional servicing is usually the safest choice.
5. Why are my scissors still dull after sharpening?
The problem may not be the cutting edge. Loose pivot screws, dirty blades, worn blade alignment, or damaged edges can all reduce cutting performance. Inspect and clean the scissors before sharpening them again.
6. How do I prevent scissors from becoming dull quickly?
Use the correct scissors for each task, clean them after use, store them in a dry place, and avoid cutting materials they were not designed to handle.
7. When should I replace my scissors instead of sharpening them?
Replace scissors if the blades are cracked, badly bent, heavily rusted, or worn beyond repair. If repeated sharpening no longer improves cutting performance, replacement is usually the better option.
Conclusion
Knowing how to sharpen scissors at home can save money, improve cutting performance, and extend the life of your favorite household tools. Whether you choose aluminum foil, fine-grit sandpaper, a sharpening stone, or a manual scissor sharpener, the key is using the right method for the type of scissors you own.
Remember that sharpening is only part of proper maintenance. Cleaning the blades, lubricating the pivot, tightening loose screws, and storing scissors correctly all help them stay sharp longer.
By following the safe techniques in this guide and avoiding common sharpening mistakes, you can keep your kitchen, office, sewing, and craft scissors working smoothly for years without unnecessary replacements.




Leave a Reply