
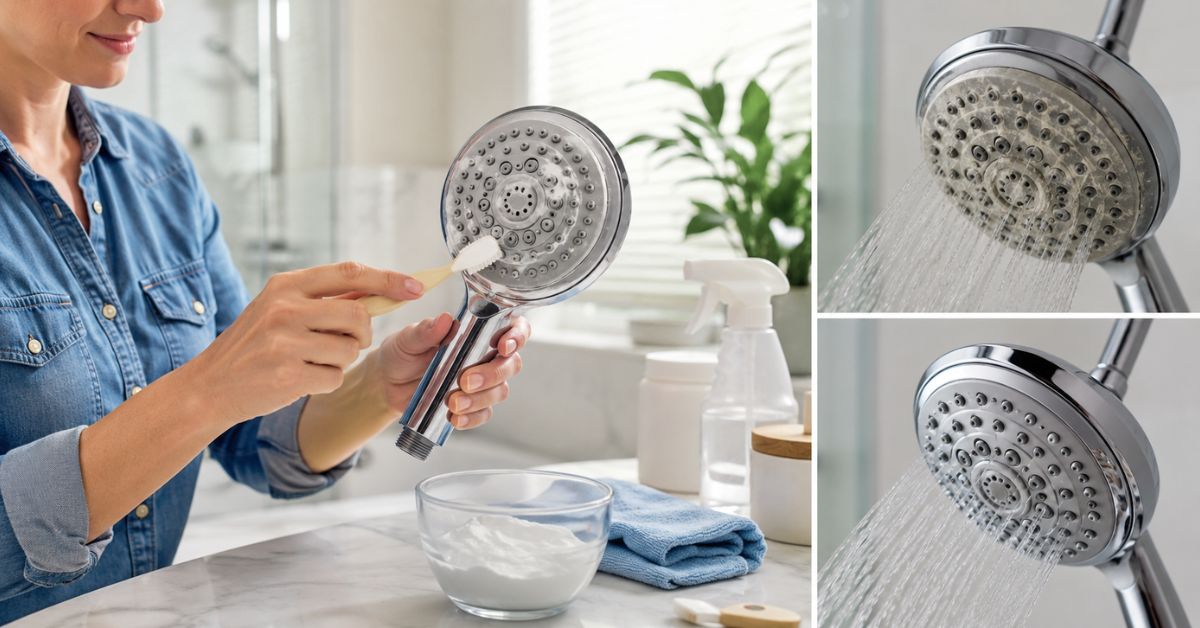
A weak shower can turn a relaxing routine into a frustrating experience. If your shower head sprays unevenly, sends water in different directions, or has lower water pressure than usual, mineral buildup is often the cause. In many homes across the United States, hard water leaves behind calcium and magnesium deposits that slowly clog the tiny spray holes.
Many cleaning guides recommend vinegar as the first solution. While vinegar is effective for many people, it is not always the best choice. Its acidic nature can dull or damage certain finishes over time, and many homeowners simply dislike the strong smell. If you have a matte black, brushed nickel, or specialty-finished shower head, you may also prefer a gentler approach.
The good news is that learning how to clean a shower head without vinegar is easier than most people think. Several safe methods remove mineral deposits, improve water flow, and help extend the life of your shower fixture without exposing it to harsh acids.
During regular housekeeping, I’ve found that cleaning a shower head before the buildup becomes severe saves time and keeps bathrooms looking fresh. A few minutes of maintenance every month usually prevents expensive replacements and keeps water flowing properly.
In this guide, you’ll learn practical techniques that actually work. Every method is suitable for routine household cleaning when used correctly, and each one includes tips on when to use it, when to avoid it, and how to protect different shower head finishes.
Why Shower Heads Become Clogged
Understanding why a shower head becomes clogged helps you choose the best cleaning method and avoid the same problem in the future.
The most common reason is hard water buildup. Hard water contains dissolved minerals such as calcium and magnesium. Every time you shower, tiny amounts of these minerals remain inside the nozzles. As the water evaporates, the minerals harden into white or chalky deposits that gradually block water flow.
Soap residue is another common problem. Body wash, shampoo, and soap create a thin film that traps dust and minerals. Over time, this sticky layer becomes thicker and makes cleaning more difficult.
Bathrooms also stay warm and humid for long periods. Moisture encourages mildew and bacteria to develop around rubber spray nozzles and inside the shower head. While mineral deposits reduce water pressure, mildew can create unpleasant odors and dark spots around the fixture.
Older plumbing systems may contribute as well. Tiny particles of rust or sediment sometimes travel through household pipes and collect inside the shower head. Even if your water is not especially hard, these particles can reduce performance.
Several factors increase the speed of buildup:
- Hard water in your area
- Infrequent bathroom cleaning
- High mineral content in well water
- Leaving water inside the shower head after every use
- Skipping regular shower head maintenance
These issues develop slowly, so many homeowners do not notice them until the shower pressure becomes noticeably weaker.
Signs Your Shower Head Needs Cleaning
Many people assume a shower head is failing when it simply needs cleaning. Knowing the warning signs helps you solve the problem before replacing the fixture.
One of the first signs is reduced water pressure. If your plumbing works normally everywhere else in the house but your shower feels weaker, mineral deposits are likely restricting the water flow.
Uneven spray patterns are another common symptom. Instead of producing an even stream, the shower may spray sideways, upward, or in random directions because several holes have become blocked.
You may also notice white, green, or chalky residue around the edges of the shower head. This is a visible sign of mineral accumulation.
Other indicators include:
- Water spraying from only a few nozzles
- Slow drainage after turning off the shower
- Small black spots caused by mildew
- A rough or crusty surface around the spray holes
- Increased cleaning time because soap no longer rinses away easily
If you notice one or more of these signs, it’s a good time to learn how to clean a shower head without vinegar before the buildup becomes severe.
Can You Clean a Shower Head Without Vinegar?
Absolutely.
Although vinegar has been a traditional cleaning solution for years, it is not the only effective option. Several alternatives remove mineral deposits while being gentler on many modern finishes.
Baking soda, citric acid, mild dish soap, hydrogen peroxide for sanitation when appropriate, and specially designed limescale removers can all produce excellent results.
Many homeowners choose vinegar-free methods because they:
- Avoid the strong vinegar smell.
- Are safer for some decorative finishes.
- Reduce the risk of dulling protective coatings.
- Work well during regular maintenance.
- Offer more flexibility for different types of buildup.
The best cleaning method depends on what is causing the blockage. Heavy mineral deposits require a different approach than soap scum or mildew.
Before starting any cleaning method, always check the manufacturer’s care instructions if they are available. Some premium shower heads have protective finishes that require specific cleaning products.
Method 1: Baking Soda Paste
If you want a gentle but effective way to clean a shower head naturally, baking soda is one of the safest household cleaners available.
Baking soda works as a mild abrasive that helps loosen mineral deposits and soap residue without scratching most shower head finishes. It is especially useful for routine maintenance before heavy buildup develops.
What You’ll Need
- Baking soda
- Warm water
- Small bowl
- Soft toothbrush
- Microfiber cloth
Step 1: Make the Paste
Mix approximately three parts baking soda with one part warm water until a thick paste forms. The consistency should be similar to toothpaste so it stays on the showerhead rather than dripping off.
Step 2: Apply the Paste
Spread the paste over the face of the showerhead, paying special attention to the spray holes, where mineral deposits usually collect.
Avoid using metal brushes or rough scrubbing pads because they can scratch chrome, brushed nickel, or matte finishes.
Step 3: Let It Sit
Allow the paste to remain on the shower head for about 20–30 minutes.
This waiting period gives the baking soda time to soften soap residue and loosen light mineral buildup.
Step 4: Gently Scrub
Using a soft toothbrush, clean around every nozzle with gentle circular motions.
Do not force the bristles into the holes. Gentle brushing is usually enough to remove loosened deposits.
Step 5: Rinse Thoroughly
Turn on warm water and allow it to flush through the shower head for one to two minutes.
If possible, wipe the exterior with a microfiber cloth to remove any remaining residue and leave a polished finish.
Why This Method Works
Baking soda lifts dirt and soap residue while helping loosen early mineral deposits. Although it is slower than stronger acidic cleaners, it is much gentler for routine shower head maintenance.
When Not to Use This Method
Do not rely on baking soda alone if the shower head has years of heavy mineral buildup. In that situation, a stronger descaling method, such as a citric acid solution or a manufacturer-approved limescale remover, is usually more effective.
Housekeeping Tip
I like to use the leftover baking soda paste around the shower controls and faucet after finishing the shower head. Cleaning nearby fixtures at the same time keeps the entire shower looking consistently fresh and saves effort later.
Method 2: Citric Acid Solution
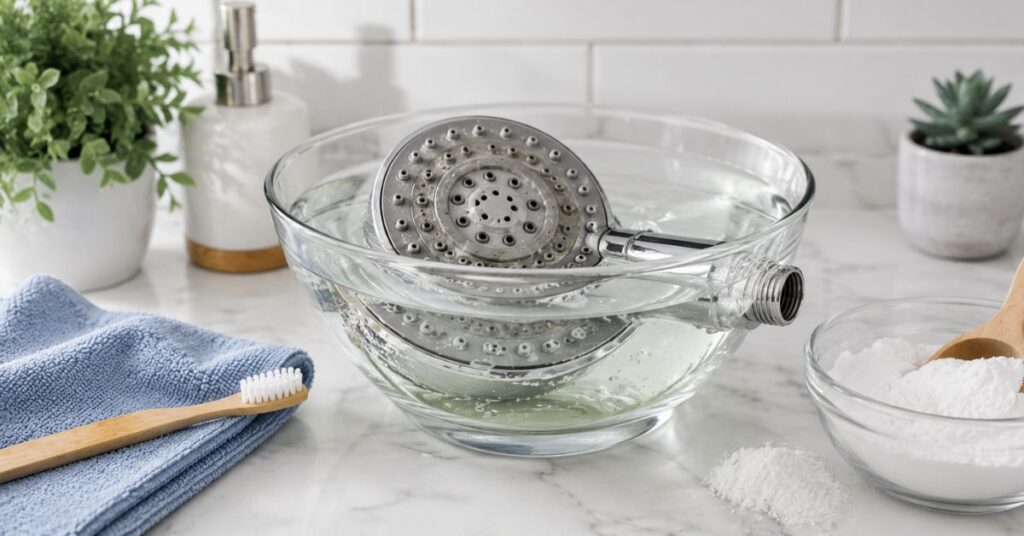
If baking soda is not strong enough to remove stubborn mineral deposits, a citric acid solution is often the next best choice. Citric acid is naturally found in citrus fruits and is commonly used in household descaling products. It is effective at dissolving hard water deposits while producing much less odor than vinegar.
For homeowners looking for how to clean a shower head without vinegar, citric acid is one of the most reliable alternatives. It works especially well on shower heads that have visible white mineral buildup but are still in good overall condition.
What You’ll Need
- Food-grade citric acid powder
- Warm water
- A bowl or container
- A plastic bag (if the shower head cannot be removed)
- Rubber band or zip tie
- Soft toothbrush
- Microfiber cloth
Step 1: Prepare the Solution
Mix about 2 tablespoons of citric acid powder with 2 cups of warm water until the powder dissolves completely. Warm water helps activate the solution and improves its cleaning ability.
Step 2: Soak the Shower Head
If your shower head is removable, place it directly into the solution.
If it is attached, pour the solution into a plastic bag and carefully secure it around the shower head so the spray face is fully submerged.
Step 3: Let It Work
Allow the shower head to soak for 20 to 40 minutes.
For heavy hard water buildup, you may need to leave it slightly longer. However, avoid soaking decorative finishes for several hours unless the manufacturer specifically recommends it.
Step 4: Brush Away the Deposits
Remove the shower head from the solution and gently scrub around each spray nozzle using a soft toothbrush.
Most mineral deposits should loosen easily after soaking.
Step 5: Flush with Warm Water
Run hot water through the shower head for two to three minutes to wash away any remaining residue and loose mineral particles.
Why This Method Works
Citric acid reacts with calcium and magnesium deposits, helping to break them down so they rinse away more easily. It is especially effective when dealing with mineral deposit problems caused by hard water.
Best For
- Chrome shower heads
- Stainless steel
- Plastic shower heads
- Moderate to heavy limescale
Avoid This Method When
Some premium finishes, including certain painted or powder-coated fixtures, may have manufacturer restrictions regarding acidic cleaners. Always check the care instructions first.
Expert Housekeeping Tip
If you live in a hard water area, cleaning your shower head every four to six weeks with a citric acid solution can prevent severe mineral buildup and help maintain steady water pressure.
Method 3: Dish Soap and Warm Water
Sometimes a clogged shower head is not caused by minerals alone. Soap residue, shampoo buildup, body oils, and everyday bathroom dirt can also block the spray holes.
In these situations, mild dish soap is often the best way to clean a shower head before moving on to stronger descaling methods.
Dish soap is gentle enough for routine cleaning and safe for nearly every shower head finish.
What You’ll Need
- Mild dish soap
- Warm water
- Soft sponge
- Soft toothbrush
- Microfiber cloth
Step 1: Prepare Warm Soapy Water
Fill a bowl with warm water and add a few drops of dish soap.
Avoid using very hot water on plastic shower heads because excessive heat may affect some components.
Step 2: Wash the Exterior
Dip a soft sponge into the solution and wipe the outside of the shower head.
This removes body oils, soap film, dust, and light grime before focusing on the spray holes.
Step 3: Clean the Nozzles
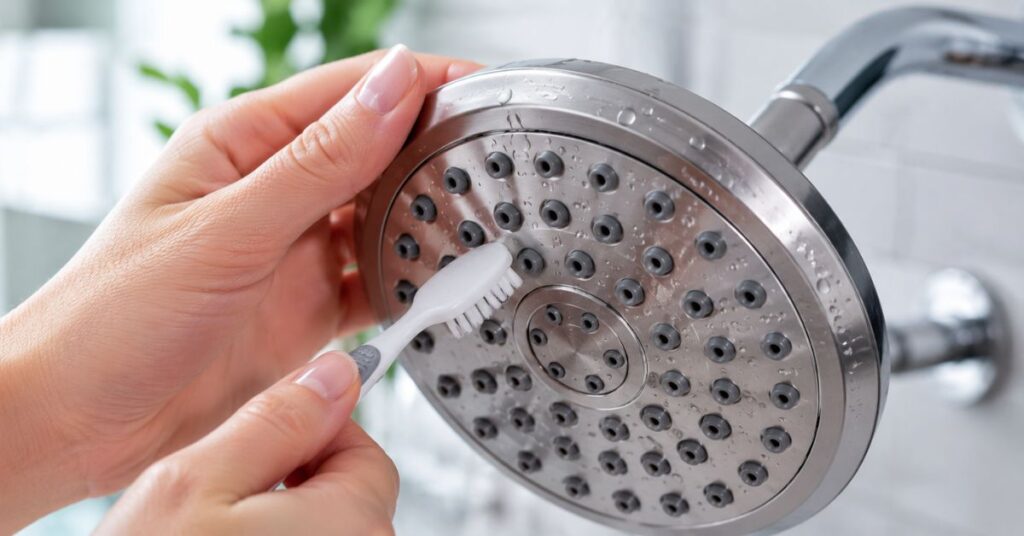
Use a soft toothbrush to gently scrub around each nozzle.
Pay extra attention to areas where soap residue has collected.
Step 4: Rinse Thoroughly
Turn on warm water for several minutes so the inside of the shower head is completely flushed.
Why This Method Works
Dish soap breaks down greasy residue that attracts mineral deposits. Although it does not dissolve heavy limescale by itself, it is an excellent first step in safe shower cleaning and regular bathroom cleaning tips.
Best For
- Weekly maintenance
- Soap scum removal
- Homes with softened water
- Matte black finishes
- Brushed nickel fixtures
When This Method Isn’t Enough
If white mineral deposits remain after cleaning, combine routine dish soap cleaning with occasional citric acid descaling.
Method 4: Hydrogen Peroxide (When Appropriate)
Hydrogen peroxide is primarily a disinfecting cleaner rather than a mineral remover. It is useful when mildew, mold, or bacteria are present around the shower head.
Many homeowners confuse mineral buildup with mold, but they require different treatments.
If your shower head has dark spots around the rubber nozzles or has developed an unpleasant odor, hydrogen peroxide can help sanitize those areas.
What You’ll Need
- 3% hydrogen peroxide
- Spray bottle
- Soft cloth
- Soft toothbrush
- Gloves (optional)
Step 1: Spray the Surface
Spray hydrogen peroxide directly onto the outside of the shower head.
Focus on the spray nozzles and surrounding surfaces where mildew is visible.
Step 2: Wait
Allow the solution to remain for about 10 to 15 minutes.
This gives it enough time to disinfect the surface.
Step 3: Brush Gently
Use a soft toothbrush to remove loosened residue.
Step 4: Rinse Well
Run warm water through the shower head for several minutes.
Why This Method Works
Hydrogen peroxide helps kill many common household germs and can loosen mildew around rubber spray nozzles. It supports a cleaner bathroom environment but does not replace a descaling treatment for hard water buildup.
Important Safety Note
Never mix hydrogen peroxide with vinegar, bleach, or other household chemicals. Use only one cleaning product at a time and rinse thoroughly before switching to another cleaner.
Best For
- Mold spots
- Mildew around nozzles
- Sanitizing bathroom fixtures
- Routine bathroom hygiene
Method 5: Commercial Limescale Remover
When years of mineral buildup have reduced water pressure significantly, a commercial limescale remover may provide the fastest results.
Modern descaling products are specifically formulated to dissolve calcium deposits while protecting many plumbing fixtures when used exactly as directed.
This option is ideal when homeowners have already tried household cleaning methods without success.
Choosing the Right Product
Look for products that clearly state they are suitable for:
- Shower heads
- Bathroom fixtures
- Chrome finishes
- Stainless steel
- Hard water deposits
Avoid products containing harsh abrasives that require aggressive scrubbing.
Step 1: Read the Instructions
Every cleaner is different.
Follow the manufacturer’s directions regarding dilution, soaking time, and rinsing requirements.
Step 2: Apply Carefully
Some products require soaking while others are sprayed directly onto the shower head.
Always protect nearby stone surfaces, natural marble, or granite, as some descalers may damage them.
Step 3: Allow the Cleaner to Work
Most products require between 5 and 20 minutes.
Avoid leaving them on longer than recommended.
Step 4: Brush if Needed
After soaking, gently brush around the spray nozzles using a soft toothbrush.
Step 5: Flush Completely
Run warm water through the shower head for several minutes until every trace of cleaner has been removed.
Why This Method Works
Commercial descalers are formulated specifically to remove limescale from shower head components efficiently. They often work faster than homemade solutions on severe mineral buildup.
Best For
- Heavy mineral deposits
- Very old shower heads
- Extremely hard water areas
- Deep cleaning before replacing a fixture
Safety Precautions
Always wear gloves if recommended by the product label.
Ensure good bathroom ventilation while using stronger cleaning products.
Keep cleaners away from children and pets.
Never combine commercial cleaners with bleach, ammonia, or other household chemicals.
Housekeeping Tip
If you repeatedly need a commercial descaler every few months, your home’s water may contain a high level of minerals. Installing a water softener or an inline shower filter can help reduce future buildup and make regular shower head maintenance much easier.
Method 6: Toothbrush Cleaning
Sometimes the simplest cleaning tool is the most effective. A soft toothbrush can reach into the tiny spray nozzles of a shower head and remove loosened mineral deposits, soap scum, and dirt without scratching the surface. While a toothbrush alone will not dissolve heavy hard water buildup, it is an essential part of almost every cleaning method.
If you are learning how to clean a shower head without vinegar, using a toothbrush correctly can make a noticeable difference after soaking the shower head in baking soda, citric acid, or a commercial descaler.
What You’ll Need
- Soft-bristled toothbrush
- Warm water
- Microfiber cloth
- Wooden toothpick (optional for stubborn debris)
Step 1: Wet the Shower Head
Before scrubbing, rinse the shower head with warm water. This softens loose dirt and makes brushing easier.
Step 2: Brush Around Each Nozzle
Using gentle circular motions, clean every spray nozzle. Work across the entire face of the shower head instead of focusing on only the clogged areas.
Do not press too hard. The goal is to loosen debris, not force it deeper into the openings.
Step 3: Clean the Outer Surface
Continue brushing around the edges, joints, and decorative trim where soap residue often collects.
These areas are frequently overlooked during regular bathroom cleaning but can quickly accumulate grime.
Step 4: Flush the Nozzles
Turn on the shower and let warm water run for two to three minutes.
The water pressure helps push loosened mineral particles out of the spray holes.
Step 5: Wipe Dry
Finish by wiping the shower head with a clean microfiber cloth.
Drying the surface helps reduce future water spots and leaves the fixture looking polished.
Why This Method Works
A toothbrush provides precise cleaning without damaging most shower head finishes. It removes softened deposits after soaking and keeps the spray holes open, improving water flow.
Best For
- Weekly maintenance
- Removing soap scum
- Cleaning rubber spray nozzles
- Light mineral buildup
- Finishing after other cleaning methods
When Not to Use This Method
Avoid using old toothbrushes with stiff or damaged bristles, as they may scratch delicate decorative finishes. Never replace the toothbrush with a wire brush or steel wool.
Expert Housekeeping Tip
Keep a dedicated cleaning toothbrush in your bathroom supplies instead of reusing one from daily oral care. Label it clearly so it is never used for anything else.
Method 7: Deep Soaking Method
When a shower head has not been cleaned for months or even years, surface cleaning may not be enough. In these cases, a deep soaking method gives the cleaning solution enough time to loosen thick mineral deposits inside the fixture.
This is one of the most effective ways to deep clean shower head components without replacing them.
What You’ll Need
- Large bowl or bucket
- Warm cleaning solution (citric acid or a manufacturer-approved descaler)
- Soft toothbrush
- Microfiber cloth
- Adjustable wrench (if removal is necessary)
- Soft towel to protect the fixture during removal
Step 1: Remove the Shower Head
If your shower head is removable, carefully unscrew it according to the manufacturer’s instructions.
Wrap the connection with a soft towel before using a wrench to avoid scratching the finish.
If the shower head cannot be removed, secure a plastic bag filled with cleaning solution around it using a rubber band.
Step 2: Allow a Longer Soak
Submerge the shower head for approximately 30 to 60 minutes.
For severe hard water buildup, follow the cleaner’s recommended soaking time rather than extending it unnecessarily.
Long soaking periods are not always better and may affect certain decorative finishes.
Step 3: Inspect the Spray Holes
After soaking, examine each nozzle closely.
Most white mineral deposits should now be soft enough to remove with a gentle toothbrush.
If necessary, carefully use a wooden toothpick to loosen debris from individual openings.
Avoid using metal pins, sewing needles, or paper clips because they can damage rubber nozzles or enlarge the spray holes.
Step 4: Rinse Thoroughly
Flush the shower head with warm water for several minutes.
Rotate adjustable spray settings during rinsing to ensure water reaches every internal passage.
Step 5: Reinstall the Shower Head
Reattach the shower head securely, making sure the connection is tight but not over-tightened.
Turn on the shower and check for leaks while confirming that the spray pattern has improved.
Why This Method Works
Deep soaking allows the cleaning solution to reach internal channels that cannot be cleaned by surface scrubbing alone. This process helps remove mineral deposits, restore water pressure, and improve overall shower performance.
Best For
- Heavy hard water buildup
- Reduced water pressure
- Older shower heads
- Annual deep cleaning
Avoid This Method When
Do not soak shower heads that contain electronic components, LED lighting, Bluetooth speakers, or other special features unless the manufacturer specifically states that soaking is safe.
Mistakes to Avoid
Many shower heads become damaged not because of mineral buildup, but because of incorrect cleaning methods. Avoiding these common mistakes will help extend the life of your fixture.
Using Steel Wool or Wire Brushes
Metal scrubbers may remove dirt quickly, but they also scratch chrome, stainless steel, and decorative finishes.
Always choose soft cleaning tools.
Leaving Cleaning Solutions Too Long
Long soaking times do not always produce better results.
Leaving acidic cleaners on decorative finishes for several hours may dull protective coatings.
Follow recommended soaking times instead.
Mixing Household Chemicals
Never combine bleach, ammonia, hydrogen peroxide, or commercial descalers.
Mixing cleaning chemicals can produce dangerous fumes or reduce their effectiveness.
Ignoring the Manufacturer’s Instructions
Premium shower heads often include special finishes that require gentle cleaning products.
Checking the care guide before cleaning can prevent accidental damage.
Skipping Regular Maintenance
Waiting until the shower pressure becomes very weak makes cleaning more difficult.
Routine shower head maintenance takes only a few minutes and helps prevent severe mineral buildup.
Forgetting to Flush the Shower Head
After cleaning, always run warm water through the shower head.
This removes loose debris and any remaining cleaning solution from inside the fixture.
Using Sharp Metal Objects
Many people try to clear blocked spray holes using sewing needles or safety pins.
These tools can permanently damage rubber nozzles and change the spray pattern.
A wooden toothpick is usually a much safer choice.
Cleaning Different Shower Head Materials
Not every shower head is made from the same material. Choosing the right cleaning method helps protect the finish while still removing buildup effectively.
Chrome Shower Heads
Chrome is durable and easy to maintain.
Baking soda, mild dish soap, citric acid, and approved limescale removers are generally suitable when used correctly.
Always finish by drying the surface with a microfiber cloth to prevent water spots.
Stainless Steel Shower Heads
Stainless steel resists corrosion well but can still collect mineral deposits.
Clean using non-abrasive products and wipe in the direction of the metal grain whenever possible.
Avoid steel wool, which may scratch the finish.
Brushed Nickel Shower Heads
Brushed nickel has a softer appearance than chrome and requires gentler cleaning.
Mild dish soap and baking soda are excellent choices for regular maintenance.
If using citric acid, avoid extended soaking and rinse thoroughly afterward.
Matte Black Shower Heads
Matte black finishes are popular in modern bathrooms but require extra care.
Avoid abrasive powders, rough scrubbers, and harsh chemicals.
Use warm soapy water for weekly cleaning and a soft microfiber cloth for drying.
Keeping the surface dry after each shower helps reduce water spots.
Plastic Shower Heads
Plastic fixtures are lightweight and affordable but can scratch easily.
Use only soft brushes and gentle cleaners.
Avoid extremely hot water during soaking, as excessive heat may affect some plastic components.
Brass Shower Heads
Brass shower heads often have protective coatings that preserve their appearance.
Follow the manufacturer’s recommendations carefully and avoid aggressive scrubbing.
Mild soap and soft cloths are usually sufficient for routine cleaning.
Rain Shower Heads
Large rain shower heads have many spray nozzles, making them more likely to trap mineral deposits.
Rotate the fixture while rinsing to ensure every nozzle is flushed properly after cleaning.
Housekeeping Tip
Whenever you buy a new shower head, save the care instructions. Having the manufacturer’s cleaning recommendations on hand makes future maintenance easier and helps you choose the safest products for your specific finish.
By matching the cleaning method to the material, you can keep your shower fixture looking new while extending its lifespan and maintaining strong water pressure.
How Often Should You Clean a Shower Head?
One of the easiest ways to avoid clogged spray nozzles and poor water pressure is to clean your shower head on a regular schedule. Waiting until the water flow becomes weak usually means mineral deposits have already hardened, making the cleaning process more difficult.
For most homes, a light cleaning every 2 to 4 weeks is enough to keep soap residue and early mineral buildup under control. If you live in an area with hard water, a deeper cleaning every 4 to 6 weeks is a good habit. This simple routine can prevent stubborn limescale from forming and help your shower head last longer.
If your home uses a water softener, you may not need to clean the shower head as often because fewer minerals remain behind after each shower. However, soap scum and everyday dirt can still build up, so regular maintenance is still important.
You may need to clean your shower head sooner if you notice:
- Lower water pressure than usual.
- Water spraying in different directions.
- White or chalky deposits around the nozzles.
- Black spots caused by mildew.
- Water taking longer to drain from the shower head after use.
Cleaning before these problems become severe is the easiest and safest approach.
Maintenance Tips to Prevent Future Buildup
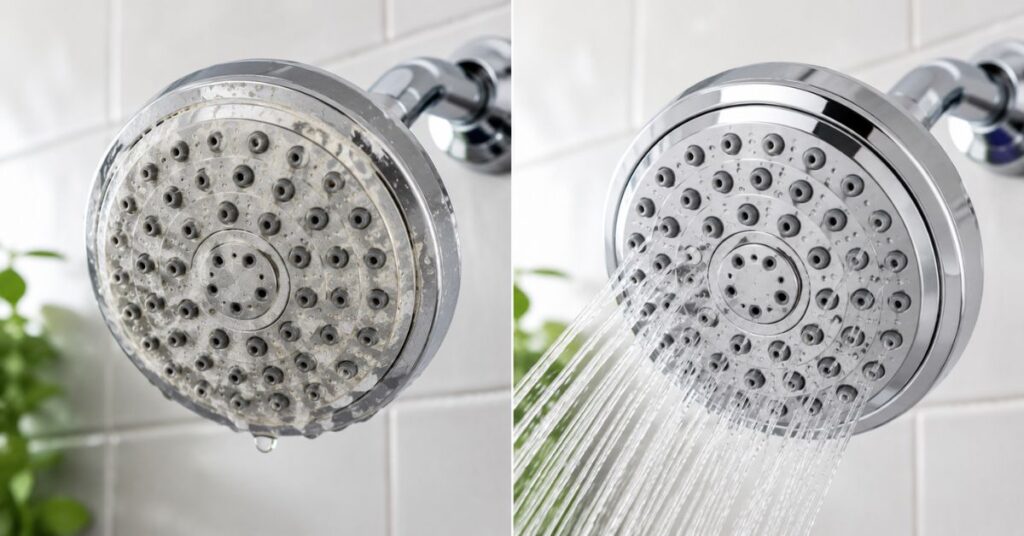
Learning how to clean a shower head without vinegar is only part of the solution. Regular maintenance can significantly reduce the amount of cleaning required throughout the year.
Dry the Shower Head After Cleaning
Once you finish cleaning, wipe the shower head with a microfiber cloth. Removing standing water helps reduce mineral spots and keeps chrome and stainless steel finishes looking shiny.
Run Hot Water for a Few Seconds
After every shower, let hot water run briefly before turning the shower off completely. This can help flush away loose soap residue from inside the nozzles.
Wipe Away Soap Residue Weekly
Soap film attracts minerals and makes hard water deposits stick more easily. A quick weekly wipe with warm water and a soft cloth helps prevent buildup.
Keep the Bathroom Well Ventilated
Use the bathroom exhaust fan or open a window after showering. Lower humidity reduces the chance of mildew developing around the shower head.
Inspect the Spray Holes
Every few weeks, take a close look at the spray nozzles. If you notice small white deposits, remove them early before they harden.
Consider a Shower Filter
If you have very hard water, an inline shower filter may reduce mineral buildup and make future cleaning easier. While it may not remove every mineral, it often helps reduce the amount of limescale left behind.
Avoid Harsh Cleaners
Strong chemicals and abrasive tools can damage decorative finishes. Gentle, routine cleaning is usually much more effective than occasional aggressive scrubbing.
FAQs
1. Can I clean a shower head without using vinegar?
Yes. Baking soda, citric acid, mild dish soap, hydrogen peroxide for sanitizing, and manufacturer-approved limescale removers are all effective alternatives. The best option depends on whether the problem is mineral deposits, soap scum, or mildew.
2. What causes white buildup on a shower head?
The white residue is usually caused by calcium and magnesium left behind by hard water. As water evaporates, these minerals harden into limescale, which can clog the spray nozzles and reduce water pressure.
3. Is baking soda enough to remove hard water deposits?
Baking soda works well for light mineral buildup and routine maintenance. If the deposits are thick or have been building up for a long time, a citric acid solution or a suitable commercial descaler is often more effective.
4. Can I use hydrogen peroxide instead of vinegar?
Hydrogen peroxide is useful for disinfecting mildew and mold, but it is not designed to dissolve heavy mineral deposits. It works best as a sanitizing step rather than a replacement for descaling products.
5. How do I know if my shower head needs replacing instead of cleaning?
If you have cleaned the shower head thoroughly and the water pressure is still poor, the internal parts may be worn or damaged. Cracks, leaks, broken spray settings, or severe corrosion are also signs that replacement may be a better option.
6. Is it safe to clean a matte black shower head with citric acid?
Many matte black finishes can be sensitive to acidic cleaners. Always check the manufacturer’s care instructions before using citric acid, and avoid soaking the fixture longer than recommended.
7. What is the best way to prevent hard water buildup?
The easiest way is to clean your shower head regularly before heavy deposits form. Wiping away moisture after showering, maintaining good bathroom ventilation, and using a shower filter in hard water areas can also help reduce mineral buildup.
Conclusion
A clogged shower head doesn’t always need expensive repairs or replacement. In many cases, a little routine maintenance is enough to restore strong water pressure and improve your daily shower.
Now that you know how to clean a shower head without vinegar, you can choose a method that suits both your cleaning needs and the finish of your fixture. Baking soda is ideal for regular maintenance, citric acid works well on stubborn limescale, dish soap removes everyday grime, hydrogen peroxide helps sanitize mildew-prone areas, and commercial descalers are useful for heavy mineral buildup.
The key is to clean the shower head before deposits become severe. Gentle tools, proper rinsing, and regular maintenance will help keep your shower working efficiently while protecting chrome, stainless steel, brushed nickel, matte black, plastic, and other common finishes.
With a few simple housekeeping habits, you can enjoy better water flow, a cleaner bathroom, and a shower head that stays in great condition for years to come.





Leave a Reply