
Clean a garbage disposal makes kitchen cleanup faster and more convenient, but they can quickly become a source of unpleasant odors, stubborn buildup, and slow drainage if they aren’t cleaned regularly. Tiny food particles, grease, soap residue, and moisture can collect inside the disposal and drain, creating the perfect environment for bacteria and mold to grow.
The good news is that you don’t need expensive cleaning products or harsh chemicals to keep your garbage disposal in top condition. With a few common household ingredients like baking soda, white vinegar, ice cubes, and lemons, you can safely remove grime, eliminate foul smells, and keep your disposal running efficiently.
In this comprehensive guide, you’ll learn how to clean a garbage disposal drain step by step using simple, natural methods that are safe for most kitchen disposals. We’ll also cover common mistakes to avoid, maintenance tips to prevent future clogs, and expert advice to help extend the life of your garbage disposal.
Whether your disposal smells bad, drains slowly, or simply needs routine maintenance, this guide will help you restore it to peak performance.
Quick Summary
| Feature | Details |
| Cleaning Time | 15–20 Minutes |
| Difficulty Level | Easy |
| Best Cleaning Method | Baking Soda, White Vinegar, Ice Cubes, and Lemon |
| Cleaning Frequency | Once a Week |
| Suitable For | Most Household Garbage Disposals |
| Harsh Chemicals Required? | No |
Why You Should Clean a Garbage Disposal Drain
Many homeowners don’t think about cleaning their garbage disposal until an unpleasant smell or clog develops. However, regular maintenance is one of the easiest ways to keep your kitchen fresh, your plumbing flowing smoothly, and your garbage disposal working efficiently.
Here are the main reasons why cleaning your garbage disposal drain should be part of your regular kitchen cleaning routine.
Removes Food Residue
Every time you use your garbage disposal, tiny pieces of food can stick to the grinding chamber, splash guard, and drain walls. Over time, these leftovers begin to rot, creating unpleasant odors and attracting bacteria.
Routine cleaning removes this hidden buildup before it becomes a bigger problem.
Eliminates Bad Odors
If your kitchen sink smells unpleasant even after washing dishes, your garbage disposal is often the culprit. Food particles trapped inside the unit can decompose quickly, producing foul odors that spread throughout your kitchen.
Natural cleaners like baking soda, vinegar, and fresh lemon peels help neutralize these odors instead of simply masking them.
Prevents Bacteria and Mold Growth
Clean a garbage disposal that stays warm and damp for long periods making them an ideal breeding ground for bacteria, mold, and mildew.
Cleaning the disposal regularly helps reduce bacterial growth and promotes a cleaner, more hygienic kitchen environment.
Prevents Clogs and Slow Drains
Grease, starch, soap scum, and food waste can gradually build up inside the drainpipe, restricting water flow. Regular cleaning helps dissolve residue before it hardens into stubborn blockages, reducing the risk of slow drains and expensive plumbing repairs.
Extends the Life of Your Garbage Disposal
Like any kitchen appliance, a garbage disposal performs better when it’s properly maintained. Removing buildup reduces strain on the motor and grinding components, helping the unit operate more efficiently and potentially extending its lifespan.
A few minutes of cleaning each week can save you from costly repairs or premature replacement.
Keeps Your Kitchen Cleaner and Fresher
Clean a garbage disposal contributes to a cleaner kitchen overall. By preventing lingering odors and reducing bacteria, you’ll enjoy a fresher-smelling sink area and a more pleasant cooking environment.
Regular maintenance also gives you peace of mind, knowing your disposal is working safely and efficiently.
Signs Your Garbage Disposal Drain Needs Cleaning
Your garbage disposal doesn’t usually stop working without warning. In most cases, it shows clear signs that it’s time for a thorough cleaning. Recognizing these warning signs early can help prevent stubborn clogs, unpleasant odors, and costly repairs.
Unpleasant Odors That Won’t Go Away
One of the most common signs is a persistent bad smell coming from your kitchen sink. Even after washing dishes or running water, the odor may linger because food particles are trapped inside the disposal or drain.
These trapped scraps decompose over time, allowing bacteria to multiply and create unpleasant smells. If your sink still smells after regular use, it’s likely time for a deep clean.
Slow Water Drainage
If water takes longer than usual to drain from your sink, food residue, grease, or soap scum may have accumulated inside the disposal or drainpipe.
Ignoring slow drainage can eventually lead to a complete blockage, making regular cleaning an important preventive measure.
Strange Grinding or Rattling Noises
While some noise is normal during operation, unusual grinding, rattling, or vibrating sounds may indicate that debris is stuck inside the disposal.
Always switch off the power before inspecting the unit. Never place your hands inside the disposal, even if it appears to be off.
Frequent Clogs
If your kitchen sink clogs repeatedly, the problem may not be your plumbing it could be buildup inside the garbage disposal itself.
Grease, fibrous vegetables, coffee grounds, and starchy foods can gradually collect in the disposal, restricting water flow and causing recurring clogs.
Fruit Flies Around the Sink
Fruit flies are attracted to decaying food. If you notice small flies hovering around your kitchen sink, leftover food inside the disposal could be the reason.
Cleaning the disposal thoroughly removes the food residue that attracts these pests.
Visible Food Buildup on the Splash Guard
The rubber splash guard often traps grease and food particles underneath its folds. If it feels slimy or has visible residue, it’s time for a deep cleaning.
Cleaning this overlooked area can make a noticeable difference in both cleanliness and odor.
Tools and Supplies You’ll Need
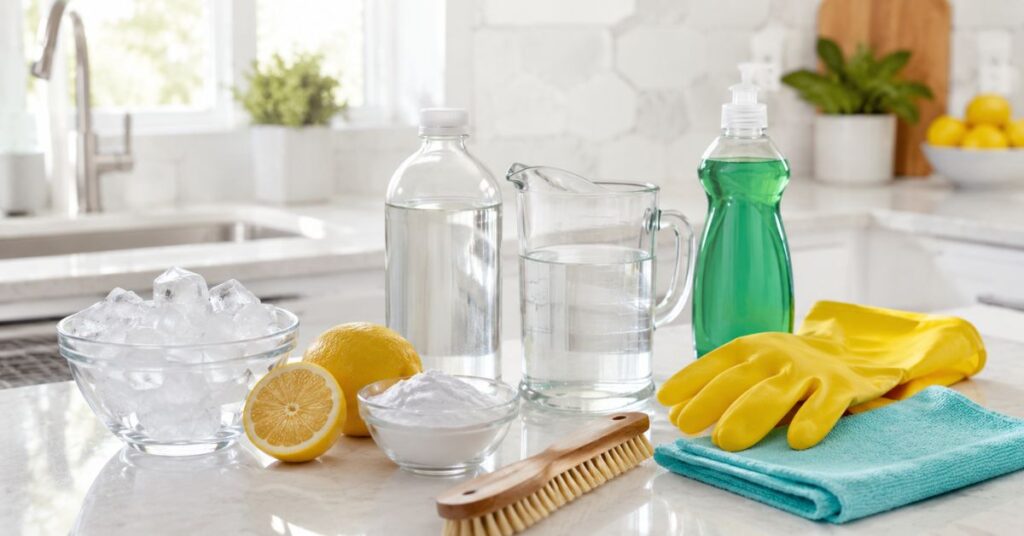
Before you begin cleaning your garbage disposal drain, gather all the necessary supplies. Having everything ready will make the process quicker, easier, and safer.
| Tool or Supply | Purpose |
| Baking Soda | Neutralizes odors and loosens grime. |
| White Vinegar | Breaks down residue and helps disinfect naturally. |
| Dish Soap | Cuts through grease and food residue. |
| Ice Cubes | Help clean the grinding chamber and dislodge buildup. |
| Lemon or Citrus Peels | Freshen the disposal with a natural scent. |
| Soft-Bristle Brush or Old Toothbrush | Cleans the rubber splash guard without causing damage. |
| Rubber Gloves | Protect your hands while cleaning. |
| Microfiber Cloth | Wipes down the exterior of the disposal and sink. |
| Hot Water | Flushes away loosened debris and residue. |
| Flashlight (Optional) | Helps inspect the inside of the disposal safely. |
Optional Cleaning Products
While natural ingredients are usually all you need, these optional products can be helpful for stubborn buildup:
- Enzyme-based garbage disposal cleaner
- Non-abrasive kitchen cleaner
- Sink drain cleaning brush
Avoid using harsh chemical drain cleaners unless specifically recommended by your garbage disposal’s manufacturer, as they can damage internal components and plumbing over time.
Safety Tips Before Cleaning
Cleaning a garbage disposal is simple, but safety should always come first. Following a few basic precautions can help prevent injuries and protect your appliance from accidental damage.
Turn Off the Power
Before cleaning any part of the garbage disposal, make sure it is completely turned off. If possible, unplug the unit or switch off the circuit breaker connected to the disposal. This eliminates the risk of accidental activation while you’re cleaning.
Never Put Your Hands Inside the Disposal
Even when the power is off, never reach deep inside the disposal with your hands. If you need to remove a visible object, use kitchen tongs or pliers instead.
Wear Rubber Gloves
Rubber gloves protect your hands from bacteria, grime, and cleaning solutions while giving you a better grip during the cleaning process.
Avoid Harsh Chemicals
Chemical drain cleaners and bleach can damage the disposal’s internal parts, rubber seals, and plumbing. Natural cleaning methods are generally safer, more eco-friendly, and effective for routine maintenance.
Pro Tip: For the best results, clean your garbage disposal once a week and perform a deeper cleaning once a month.
Step 1: Turn Off the Garbage Disposal
Safety should always come first when cleaning a garbage disposal. Before cleaning, make sure the garbage disposal is completely turned off.
What to Do
- Switch off the garbage disposal using the wall switch.
- For added safety, unplug the unit if possible or turn off the circuit breaker.
- Put on a pair of rubber gloves before starting.
Why This Step Is Important
Even if the disposal appears to be off, accidentally turning it on while cleaning could result in serious injury. Disconnecting the power ensures you can clean safely and confidently.
Safety Tip
Never place your hands deep inside the disposal. If you notice any foreign objects, remove them using kitchen tongs or long-handled pliers.
Common Mistake to Avoid
Many people only switch off the wall switch and assume the unit is safe. For maximum protection, disconnect the power source whenever possible.
Step 2: Flush the Disposal with Hot Water
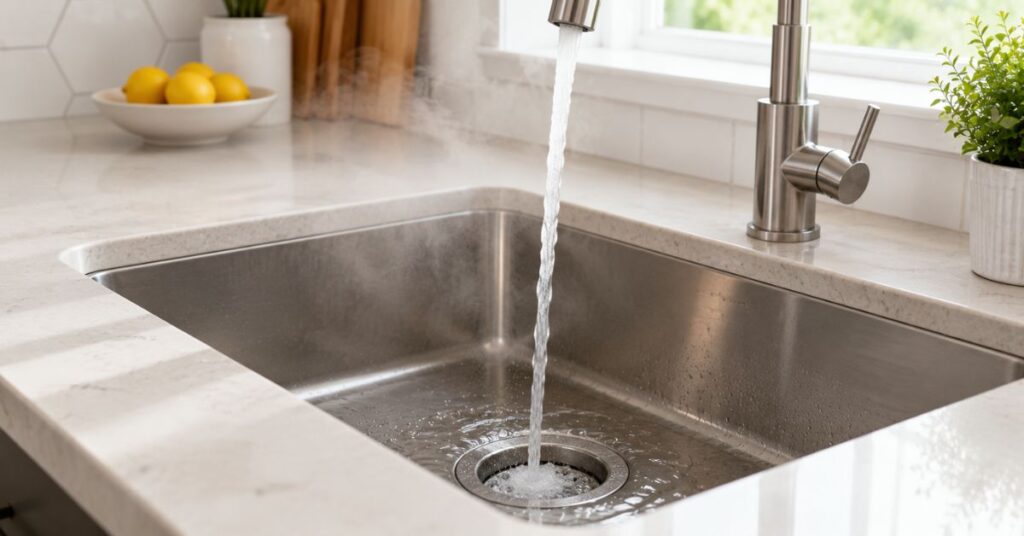
Running hot water helps loosen grease, soap residue, and small food particles that may be stuck inside the disposal and drain.
What to Do
- Turn on the hot water tap.
- Let hot water run into the disposal for about 30 to 60 seconds.
- Keep the disposal turned off during this step.
Why This Step Is Important
Hot water softens grease and washes away loose debris before you begin the deeper cleaning process.
Extra Tip
If your sink has accumulated greasy residue, adding a few drops of dish soap while running hot water can help break it down more effectively.
Common Mistake to Avoid
Avoid using boiling water if your kitchen plumbing is older or made from PVC, as extremely hot water can soften certain materials over time. Hot tap water is generally sufficient for regular cleaning.
Step 3: Add Baking Soda
Baking soda is one of the safest and most effective natural cleaners for garbage disposals. It helps absorb odors, loosen grime, and gently clean without damaging internal components.
What to Do
- Pour ½ cup of baking soda directly into the garbage disposal drain.
- Allow it to settle throughout the disposal and drainpipe.
Why This Step Is Important
Baking soda naturally neutralizes acidic odors while helping to lift stubborn food residue from the interior surfaces.
Pro Tip
If your disposal hasn’t been cleaned for several weeks, you can increase the amount to ¾ cup for a deeper clean.
Common Mistake to Avoid
Don’t immediately rinse away the baking soda. It needs time to react with the vinegar in the next step.
Step 4: Pour in White Vinegar
White vinegar works together with baking soda to create a gentle fizzing reaction that helps loosen grease, dissolve buildup, and reduce odor-causing bacteria.
What to Do
- Slowly pour 1 cup of white vinegar into the drain.
- Allow the mixture to fizz naturally.
You’ll notice bubbling almost immediately—this is completely normal and indicates the cleaning reaction is working.
Why This Step Is Important
The fizzing action reaches small crevices inside the disposal where food particles often become trapped.
Safety Tip
Use regular distilled white vinegar only. Avoid mixing vinegar with bleach or other chemical cleaners, as this can produce dangerous fumes.
Common Mistake to Avoid
Pouring vinegar too quickly can reduce the effectiveness of the reaction. Add it slowly to allow the foam to expand throughout the disposal.
Step 5: Let the Mixture Sit
Patience is important during this step. Giving the baking soda and vinegar time to work helps break down stubborn residue more effectively.
What to Do
- Let the mixture sit for 10–15 minutes.
- Avoid running water or turning on the disposal during this time.
Why This Step Is Important
Allowing the solution to sit gives it enough time to dissolve grease, deodorize the drain, and loosen food buildup that would otherwise remain stuck.
Extra Tip
If your disposal has a particularly strong odor, letting the mixture sit for up to 20 minutes can provide even better results.
Common Mistake to Avoid
Don’t rush this step. Washing away the solution too early reduces its cleaning power and may leave behind stubborn residue.
Step 6: Clean the Rubber Splash Guard
The rubber splash guard is one of the dirtiest parts of a garbage disposal. Food particles, grease, and bacteria often collect underneath its folds, making it a common source of unpleasant odors. Cleaning this area regularly can make a noticeable difference in the freshness of your kitchen sink.
What to Do
- Put on a pair of rubber gloves.
- Gently lift each flap of the rubber splash guard.
- Use a soft-bristle brush or an old toothbrush with a few drops of dish soap.
- Scrub both the top and underside of the splash guard to remove grease and debris.
- Rinse thoroughly with warm water.
Why This Step Is Important
Even if the grinding chamber is clean, leftover food trapped beneath the splash guard can continue to produce foul odors. Cleaning this hidden area helps eliminate bacteria and keeps the disposal smelling fresh.
Pro Tip
For extra cleaning power, dip your brush in a mixture of baking soda and water before scrubbing. This helps remove stubborn grime without damaging the rubber.
Common Mistake to Avoid
Don’t use metal brushes or sharp tools, as they can tear or damage the rubber splash guard.
Step 7: Clean the Grinding Chamber with Ice Cubes
Ice cubes provide a simple and effective way to clean the grinding chamber. As they move through the disposal, they help dislodge food residue and scrape away light buildup from the grinding components.
What to Do
- Place 1–2 cups of ice cubes into the garbage disposal.
- Turn on the cold water.
- Switch on the disposal and let it run until all the ice has been crushed.
Why This Step Is Important
The movement of the ice helps remove buildup from the grinding chamber while flushing away loosened debris. It can also help improve the disposal’s grinding performance.
Pro Tip
For a deeper clean, sprinkle a tablespoon of coarse salt over the ice before running the disposal. The salt provides gentle abrasion that helps remove stubborn residue.
Common Mistake to Avoid
Always use cold water when grinding ice. Cold water keeps grease solid so it can be flushed away instead of coating the drain.
Step 8: Freshen the Disposal with Lemon Peels
After removing grime and buildup, it’s time to freshen your garbage disposal naturally. Lemon peels release natural oils that help neutralize odors and leave your kitchen smelling clean.
What to Do
- Place a few small lemon or lime peels into the disposal.
- Turn on cold water.
- Run the disposal for 20–30 seconds until the peels have been ground completely.
Why This Step Is Important
Citrus peels don’t just add a pleasant scent—they also contain natural oils that help cut through light grease and refresh the disposal.
Pro Tip
You can also use orange or grapefruit peels for a fresh citrus fragrance.
Common Mistake to Avoid
Only use small amounts of citrus peels at one time. Large quantities can overload the disposal and may contribute to blockages.
Step 9: Flush the Drain One Final Time
The final rinse removes any remaining cleaning solution, loosened debris, and tiny food particles left behind during the cleaning process.
What to Do
- Turn on the cold water.
- Let it run for 30–60 seconds while operating the garbage disposal.
- Check that the water drains freely and that there are no lingering odors.
Why This Step Is Important
This final flush ensures that all loosened debris is washed through the plumbing system, leaving the disposal clean, fresh, and ready for use.
Pro Tip
After cleaning, leave the disposal unused for about 10–15 minutes to allow any remaining moisture to drain away naturally.
Common Mistake to Avoid
Don’t stop the water immediately after switching off the disposal. Letting the water run for a few extra seconds helps flush out any remaining particles.
Your Garbage Disposal Should Now Be Clean
After completing these nine steps, your garbage disposal should:
- Smell fresh and clean
- Drain water more efficiently
- Be free of food residue and grease buildup
- Operate more smoothly with reduced noise
- Be better protected against future clogs and unpleasant odors
Regular maintenance only takes a few minutes each week but can significantly extend the life of your garbage disposal and keep your kitchen cleaner and more hygienic.
Best Natural Ways to Clean a Garbage Disposal Drain
If you prefer to avoid harsh chemicals, you’re in luck. Several everyday household ingredients can effectively clean your garbage disposal, eliminate odors, and help prevent buildup. These natural methods are affordable, eco-friendly, and safe for routine maintenance.
Baking Soda and White Vinegar
Baking soda and white vinegar are one of the most effective natural cleaning combinations for garbage disposals. The fizzing reaction helps loosen food residue, dissolve grease, and neutralize unpleasant odors.
How to Use It
- Pour ½ cup of baking soda into the disposal.
- Slowly add 1 cup of white vinegar.
- Allow the mixture to fizz for 10–15 minutes.
- Flush with hot water to rinse away loosened debris.
Best For
- Removing unpleasant odors
- Breaking down grease
- Weekly maintenance
Ice Cubes and Coarse Salt
Ice cubes help scrub the grinding chamber, while coarse salt acts as a gentle abrasive to remove stubborn residue.
How to Use It
- Add 1–2 cups of ice cubes to the disposal.
- Sprinkle 2 tablespoons of coarse salt over the ice.
- Turn on cold water and run the disposal until the ice is completely crushed.
Best For
- Cleaning grinding components
- Removing light buildup
- Maintaining blade performance
Lemon or Citrus Peels
Fresh citrus peels naturally deodorize the garbage disposal and leave behind a pleasant, clean scent.
How to Use It
- Place a few small lemon, lime, or orange peels into the disposal.
- Run cold water.
- Turn on the disposal for 20–30 seconds.
Best For
- Freshening the disposal
- Light grease removal
- Eliminating lingering odors
Dish Soap and Warm Water
Grease buildup can make your garbage disposal smell unpleasant and drain more slowly. Dish soap helps dissolve grease while warm water flushes it away.
How to Use It
- Add a few drops of grease-cutting dish soap.
- Run warm water for about one minute.
- Turn on the disposal briefly to distribute the soap.
Best For
- Everyday cleaning
- Removing greasy residue
- Routine maintenance
Hot Water Flush
Sometimes, a simple hot water rinse is enough to wash away loose food particles before they have a chance to accumulate.
Run hot tap water through the disposal for 30–60 seconds after heavy use, especially after grinding foods that leave behind residue.
How to Remove Bad Odors from a Garbage Disposal
A bad smell coming from your kitchen sink is one of the most common garbage disposal complaints. Fortunately, most odors are caused by trapped food particles and can be eliminated with proper cleaning.
Clean the Rubber Splash Guard
Many homeowners overlook the rubber splash guard, but it’s often where odors originate. Food particles become trapped underneath its folds, creating the perfect environment for bacteria.
Scrub the splash guard thoroughly with dish soap and a soft brush at least once a week.
Use Baking Soda Overnight
If the odor is particularly strong, baking soda can help absorb lingering smells.
Steps
- Pour ½ cup of baking soda into the disposal before bed.
- Leave it overnight.
- Flush with warm water the following morning.
This method works well for persistent odors without using harsh chemicals.
Freshen with Citrus Peels
Grinding a few lemon or orange peels after cleaning leaves your disposal smelling fresh and clean.
Use citrus peels occasionally rather than daily to avoid excessive buildup.
Flush with Hot Water
After cleaning, always flush the disposal with water for at least one minute to remove any remaining food particles and cleaning residue.
How to Unclog a Garbage Disposal Drain Safely
A clogged garbage disposal can slow water drainage and create unpleasant odors. Before calling a plumber, you can often clear minor clogs using safe DIY methods.
Signs Your Disposal May Be Clogged
Watch for these common warning signs:
- Water drains slowly.
- Standing water remains in the sink.
- The disposal hums but doesn’t grind properly.
- Frequent backups occur after washing dishes.
- Gurgling sounds come from the drain.
Safe Ways to Remove Minor Clogs
Flush with Hot Water
For light grease buildup, running hot water for several minutes may help loosen residue and restore proper drainage.
Use Baking Soda and Vinegar
The natural fizzing reaction helps break down soft food buildup inside the drainpipe.
Allow the mixture to sit for 15 minutes before flushing thoroughly with hot water.
Check for Visible Debris
Turn off the power completely.
Using a flashlight, inspect the disposal for visible food scraps or foreign objects.
Remove any debris using long kitchen tongs or needle-nose pliers.
Never place your hands inside the disposal.
Use the Reset Button
If the disposal suddenly stops working after a clog, locate the small red reset button on the bottom of the unit.
Press the button once, wait a few seconds, and test the disposal again.
When to Call a Professional
Some problems require professional assistance rather than DIY cleaning.
Contact a plumber if:
- The disposal leaks from the bottom.
- Water backs up repeatedly.
- The motor won’t start after pressing the reset button.
- Loud grinding noises continue after cleaning.
- Multiple drains in your kitchen become clogged at the same time.
Ignoring these issues could lead to more expensive plumbing repairs later.
Things You Should Never Put in a Garbage Disposal
While garbage disposals are designed to handle many types of food waste, they’re not built to grind everything. Certain items can clog your drain, dull the grinding components, or even damage the motor. Knowing what to avoid will help keep your garbage disposal working efficiently and extend its lifespan.
| Fibrous Vegetables | Celery, corn husks, asparagus, onion skins, and artichokes contain long fibers that can tangle around the grinding mechanism. |
| Harsh Chemicals | Chemical drain cleaners may corrode internal components and shorten the disposal’s lifespan. |
| Bleach | Frequent use can damage rubber seals and certain metal parts over time. |
| Bones | Large bones are too hard for most residential garbage disposals and can damage the grinding components. |
| Fruit Pits | Peach pits, avocado seeds, and similar hard objects can damage the disposal. |
| Eggshells | The membrane inside eggshells can wrap around the grinding components, while the crushed shells may contribute to buildup. |
| Potato Peels | Their starchy texture can turn into a sticky paste that sticks to the disposal and pipes. |
| Pasta and Rice | These foods expand when they absorb water, increasing the risk of clogged drains. |
| Coffee Grounds | They form a thick, sludge-like paste that can build up in pipes and cause blockages. |
| Grease, Oil, and Fat | They harden inside pipes, leading to stubborn clogs and unpleasant odors. |
| Item | Why You Should Avoid It |
Expert Tip: Even if your garbage disposal is labeled as heavy-duty, avoiding these items will help reduce wear and prevent unnecessary plumbing issues.
Common Mistakes to Avoid
Even with regular cleaning, a few simple mistakes can reduce your garbage disposal’s performance or lead to expensive repairs. Avoid these common errors to keep your disposal running smoothly.
Using Too Much Bleach or Chemical Cleaners
Many homeowners believe bleach is the best disinfectant for a garbage disposal. However, frequent use can damage internal seals and plumbing components. Natural cleaners like baking soda and white vinegar are safer for routine maintenance.
Pouring Grease Down the Drain
Hot grease may seem harmless because it’s in liquid form, but it quickly cools and solidifies inside your pipes. This buildup is one of the leading causes of clogged kitchen drains.
Instead, let grease cool in a container before disposing of it in the trash.
Forgetting to Clean the Splash Guard
The rubber splash guard traps grease and food particles underneath its folds. Ignoring this area allows bacteria to grow, causing unpleasant odors even if the grinding chamber is clean.
Clean the splash guard at least once a week using a soft brush and dish soap.
Overloading the Garbage Disposal
Adding too much food waste at once forces the motor to work harder and increases the risk of jams.
Feed food scraps gradually while running cold water to help the disposal grind efficiently.
Running the Disposal Without Water
Water helps carry food particles through the drain and prevents residue from sticking inside the pipes.
Always run cold water before, during, and for about 30 seconds after using the garbage disposal.
Ignoring Small Problems
Strange noises, slow drainage, or mild odors may seem minor, but they often indicate developing issues.
Addressing these warning signs early can prevent more serious damage and costly repairs.
Garbage Disposal Maintenance Tips
Regular maintenance is the easiest way to prevent odors, clogs, and mechanical problems. A few simple habits can keep your garbage disposal working efficiently for years.
Daily Maintenance
- Run cold water whenever using the disposal.
- Feed food scraps gradually instead of all at once.
- Avoid disposing of grease, oil, and hard food waste.
- Flush the disposal with water for 30 seconds after each use.
Weekly Maintenance
Once a week:
- Clean with baking soda and white vinegar.
- Scrub the rubber splash guard.
- Flush with hot water.
- Grind a few ice cubes to remove light buildup.
This routine only takes about 15 minutes and helps prevent odors before they develop.
Monthly Deep Cleaning
Once each month:
- Perform a complete deep cleaning using the step-by-step method described in this guide.
- Inspect the splash guard for wear or damage.
- Check for unusual noises or slow drainage.
- Clean the sink drain and surrounding area.
Long-Term Care Tips
To maximize the lifespan of your garbage disposal:
- Grind only small food scraps.
- Cut large pieces into smaller chunks before disposing of them.
- Avoid fibrous vegetables and hard objects.
- Use natural cleaning methods whenever possible.
- Schedule professional maintenance if you notice recurring problems.
Natural Cleaner vs. Chemical Cleaner
Choosing the right cleaning method can make a big difference in both safety and effectiveness. Here’s how natural and chemical cleaners compare:
| Feature | Natural Cleaners | Chemical Cleaners |
| Safe for Most Garbage Disposals | ✅ Yes | ⚠️ Depends on the product |
| Eco-Friendly | ✅ Yes | ❌ Usually No |
| Removes Odors | ✅ Excellent | ✅ Good |
| Removes Grease | ✅ Good | ✅ Excellent |
| Risk of Damaging Components | Very Low | Higher if overused |
| Safe Around Children & Pets | Generally Yes | Use With Caution |
| Cost | Low | Moderate to High |
For routine maintenance, natural cleaners like baking soda, vinegar, and lemon peels are typically the safest and most cost-effective choice.
Pro Cleaning Tips
Professional Housekeeping Tips
- Clean your garbage disposal once a week to prevent odor buildup.
- Always use cold water while operating the disposal.
- Grind ice cubes monthly to help remove residue from the grinding chamber.
- Clean underneath the rubber splash guard during every deep cleaning.
- Avoid putting large amounts of food waste into the disposal at one time.
- If your disposal starts smelling bad, clean it immediately rather than masking the odor with air fresheners.
Safety Tips
Stay Safe While Cleaning
- Always turn off the power before cleaning.
- Never put your hands inside the disposal.
- Use tongs or pliers to remove stuck objects.
- Wear rubber gloves when cleaning.
- Never mix bleach with vinegar or other cleaning chemicals.
- Keep children away from the disposal while it’s being cleaned.
FAQs
1. How often should I clean my garbage disposal drain?
For most households, cleaning your garbage disposal drain once a week is enough to prevent odors, grease buildup, and minor clogs. If you cook frequently or use the disposal daily, consider performing a quick cleaning every few days and a deep cleaning once a month.
2. Can I use baking soda and vinegar to clean my garbage disposal?
Yes. Baking soda and white vinegar are among the safest and most effective natural cleaning solutions. Together, they help break down food residue, neutralize odors, and remove light grease without damaging the disposal.
3. Is bleach safe for cleaning a garbage disposal?
Occasional use of diluted bleach may disinfect the disposal, but it is not recommended for regular cleaning. Frequent use can damage rubber seals and metal components. Natural alternatives like baking soda, vinegar, and lemon peels are safer for routine maintenance.
4. Why does my garbage disposal smell bad?
Bad odors are usually caused by trapped food particles, grease buildup, or bacteria growing beneath the rubber splash guard. Cleaning the disposal thoroughly and maintaining it regularly can eliminate these unpleasant smells.
5. Can I put lemon peels in my garbage disposal?
Yes. Small amounts of lemon, lime, or orange peels can help freshen your garbage disposal naturally. However, avoid placing large quantities of citrus peels into the disposal at once, as they may contribute to clogs.
6. What should I do if my garbage disposal is clogged?
Start by turning off the power. Flush the drain with hot water, then use baking soda and vinegar to loosen the blockage. If necessary, inspect the disposal with a flashlight and remove visible debris using tongs or pliers. If the clog persists, it’s best to contact a licensed plumber.
7. Should I use hot or cold water when running the garbage disposal?
Always use cold water while the garbage disposal is running. Cold water helps keep grease and fats solid so they can be ground up and flushed away instead of sticking to the drainpipe.
8. What foods should never go into a garbage disposal?
Avoid disposing of grease, oil, coffee grounds, bones, eggshells, pasta, rice, potato peels, fruit pits, and fibrous vegetables like celery and corn husks. These items can damage the disposal or cause drain blockages.
9. How can I prevent my garbage disposal from smelling?
Regular maintenance is the best prevention. Clean the disposal weekly, scrub the rubber splash guard, grind a few ice cubes monthly, and occasionally freshen it with lemon peels. Also, avoid leaving food waste sitting in the disposal for long periods.
10. When should I replace my garbage disposal?
If your garbage disposal frequently clogs, leaks, makes unusual noises, or requires repeated repairs despite proper maintenance, it may be time for a replacement. Most well-maintained garbage disposals last 8–15 years, depending on the model and usage.
Conclusion
Keeping your garbage disposal drain clean doesn’t require expensive products or complicated techniques. With simple household ingredients like baking soda, white vinegar, ice cubes, and lemon peels, you can remove food buildup, eliminate unpleasant odors, and keep your disposal running smoothly.
By following the step-by-step cleaning process outlined in this guide and adopting a regular maintenance routine, you can reduce the risk of clogs, improve your kitchen’s hygiene, and extend the lifespan of your garbage disposal. Small habits—such as running cold water during use, avoiding grease and hard food scraps, and cleaning the splash guard regularly—can make a significant difference over time.
A clean garbage disposal not only helps prevent plumbing issues but also keeps your kitchen fresher and more enjoyable to use. Make garbage disposal maintenance part of your weekly cleaning routine, and you’ll enjoy better performance, fewer odors, and a healthier kitchen environment for years to come