
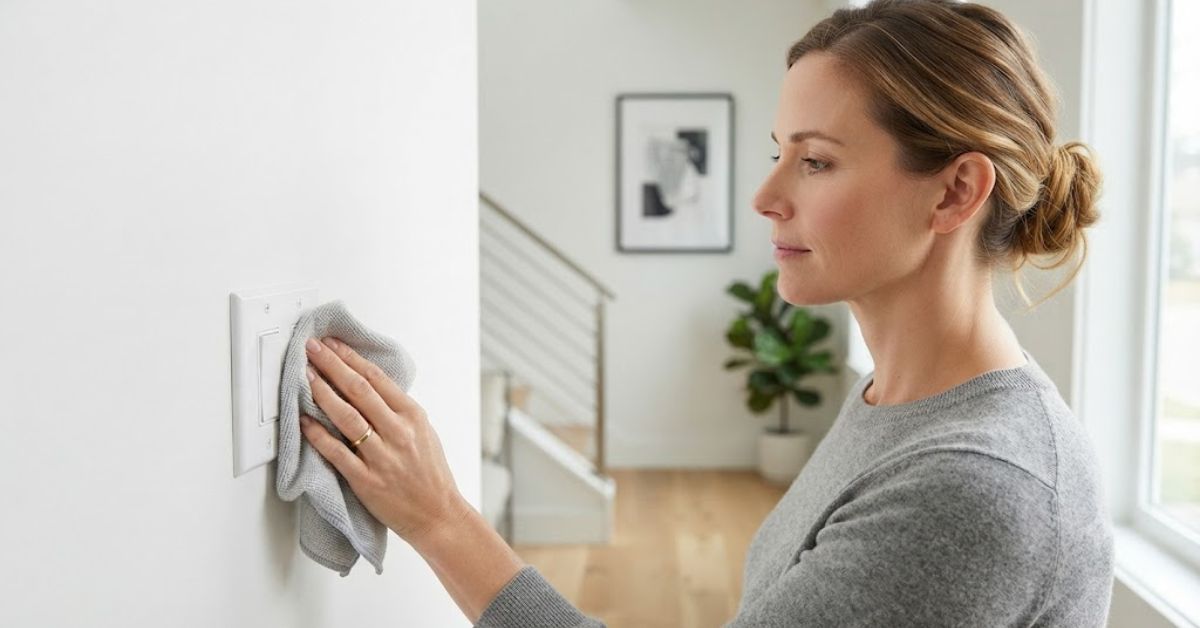
Light switches are among the most frequently touched surfaces in every home, yet they are often overlooked during routine cleaning. Every time someone enters or leaves a room, they touch the switch, transferring dirt, skin oils, bacteria, and germs. Over time, white switches become dull, fingerprints accumulate, and harmful microorganisms can spread throughout the home.
Learning how to Clean Light Switches Safely is essential for maintaining a cleaner, healthier, and more hygienic living environment. Unlike countertops or tables, light switches are electrical components, so improper cleaning can pose safety risks or even damage the switch.
At True Housekeeping, we believe that proper cleaning is not just about making your home look spotless; it’s also about protecting your family’s health while using safe cleaning practices. This guide explains everything you need to know about how to Clean Light Switches Safely, from basic dust removal to disinfecting high-touch surfaces without causing electrical damage.
Whether you’re performing weekly housekeeping, preparing for guests, or completing a deep-cleaning routine, these professional techniques will help you clean your light switches safely and effectively.
Quick Answer
The safest way to clean light switches is to turn off the power if deep cleaning is needed, use a soft microfiber cloth lightly dampened with rubbing alcohol or a gentle disinfectant, and never spray liquid directly onto the switch. This method removes fingerprints, dust, and germs while protecting the electrical components inside.
Why Cleaning Light Switches Is Important
Most homeowners clean floors, countertops, sinks, and furniture regularly, but light switches are usually forgotten. Since they are touched dozens of times each day, they can quickly become one of the dirtiest high-touch surfaces in your home.
Understanding how to Clean Light Switches Safely helps reduce the spread of bacteria while improving the appearance of your walls and switches.
1. Removes Germs from High-Touch Surfaces
Every family member touches light switches multiple times throughout the day. If hands are dirty after cooking, gardening, coughing, or returning home, germs can remain on the surface.
Regular cleaning helps disinfect high-touch surfaces and supports a healthier home.
2. Keeps White Switches Looking Bright
White plastic switches often develop:
- Fingerprints
- Dust buildup
- Yellow discoloration
- Greasy residue
- Dark smudges
Routine cleaning keeps switches looking new.
3. Improves Overall Home Hygiene
Small details make a noticeable difference. Clean switches give your home a well-maintained appearance and complement freshly cleaned walls, doors, and trim.
4. Prevents Dirt Buildup
The longer oils and dust remain on a switch, the harder they become to remove. Weekly maintenance prevents stubborn stains from forming.
Is It Safe to Clean Light Switches?
Yes, but only when done correctly.
Many homeowners mistakenly spray cleaning products directly onto electrical switches. This allows liquid to seep inside, increasing the risk of electrical damage.
When learning how to Clean Light Switches Safely, always remember these basic rules:
- Never spray cleaner directly onto the switch.
- Always apply cleaner to a cloth first.
- Use only a slightly damp microfiber cloth.
- Avoid excessive moisture.
- Never use dripping wet wipes.
- Replace cracked or damaged switches before cleaning.
- Turn off the circuit breaker before deep cleaning or removing faceplates.
Following these precautions greatly reduces the risk of damage while keeping your switches clean.
Supplies You’ll Need
Most of these items are already available in your home.
Essential Cleaning Supplies
- Microfiber cloth
- Dry microfiber duster
- Cotton swabs
- Soft toothbrush
- Rubbing alcohol (70% isopropyl alcohol)
- Mild dish soap
- Warm water
- Small spray bottle
- Disposable gloves (optional)
Optional Supplies
- Disinfecting wipes
- Melamine sponge (Magic Eraser) for stubborn stains
- Screwdriver (if removing switch plates)
- Flashlight (when power is turned off)
Using gentle products helps protect plastic surfaces while effectively removing dirt and germs.
Safety Precautions Before You Begin
Electrical safety should always come first.
Before starting How to Clean Light Switches Safely, follow these precautions.
Turn Off the Power for Deep Cleaning
If you’re only wiping the outside of the switch with a barely damp cloth, turning off the power isn’t always necessary. However, if you’re removing the faceplate or cleaning around electrical components, switch off the appropriate circuit breaker first.
Never Spray Cleaner Directly
Spraying liquids directly onto a light switch allows moisture to enter the electrical box.
Instead:
- Spray the cleaner onto your microfiber cloth.
- Wring out excess moisture.
- Wipe gently.
Avoid Excess Water
Water and electricity never mix.
Your cleaning cloth should feel slightly damp—not wet.
Inspect the Switch
Before cleaning, check for:
- Cracks
- Loose covers
- Burn marks
- Sparking
- Discoloration from heat
If you notice any of these signs, stop using the switch and have it inspected or replaced.
Best Cleaning Products for Light Switches
Not every household cleaner is safe for electrical fixtures.
Here are the safest options.
| Cleaning Product | Safe to Use | Best For |
| Microfiber cloth | ✔ | Daily dust removal |
| Rubbing alcohol | ✔ | Disinfecting germs |
| Mild dish soap | ✔ | General cleaning |
| Warm water | ✔ | Light dirt |
| Disinfecting wipes | ✔ | Quick sanitizing |
| Magic Eraser | ✔ (gently) | Removing scuff marks |
| Bleach | ✘ | Can discolor plastic |
| Abrasive cleaners | ✘ | May scratch the surface |
| Steel wool | ✘ | Damages plastic |
| Excessive water | ✘ | Electrical hazard |
Step 1: Dust the Light Switch
Before applying any cleaner, remove loose dust.
Use a clean microfiber cloth or soft duster.
Dust:
- Switch plate
- Toggle switch
- Edges
- Surrounding wall
Removing dust first prevents streaks during wet cleaning.
Step 2: Prepare Your Cleaning Cloth
Lightly dampen a microfiber cloth with:
- Rubbing alcohol
or
- Warm water mixed with one drop of mild dish soap
The cloth should never drip water.
This is one of the most important steps in How to Clean Light Switches Safely because excessive moisture can damage electrical components.
Step 3: Wipe the Entire Switch Plate
Gently clean:
- Front surface
- Around the edges
- Toggle switch
- Fingerprint areas
Use light pressure and continue wiping until the dirt disappears.
For textured switches, fold the microfiber cloth to reach small grooves.
Step 4: Disinfect High-Touch Areas
After removing visible dirt, disinfect the switch.
A microfiber cloth lightly dampened with rubbing alcohol is an excellent option because it evaporates quickly while helping eliminate many common germs.
Never pour alcohol directly onto the switch.
Instead:
- Apply alcohol to the cloth.
- Wipe the switch gently.
- Allow it to air dry completely.
This simple method helps disinfect high-touch surfaces without leaving excess moisture behind.
Pro Cleaning Tip
Professional housekeepers often include light switches in their weekly cleaning routine instead of waiting until they look dirty. Since switches are touched so frequently, regular maintenance prevents grime from building up and keeps your home looking consistently clean.
At True Housekeeping, we recommend wiping light switches at least once a week and disinfecting them more often during cold and flu season or whenever someone in your household has been sick.
Step 5: Clean Around the Edges and Tight Corners
Even after wiping the front of the switch plate, dirt often hides around the edges where the plate meets the wall. Dust, grease, and grime can collect in these narrow spaces, making the switch look dirty even after cleaning.
When learning how to Clean Light Switches Safely, paying attention to these small details makes a noticeable difference.
How to Clean the Edges
- Lightly dampen a cotton swab with rubbing alcohol.
- Gently clean around the edges of the switch plate.
- Use a dry cotton swab to remove any remaining moisture.
- Avoid pushing liquid inside the electrical box.
For textured switch plates, a soft toothbrush can help loosen stubborn dirt. Always use gentle pressure to avoid scratching the plastic.
Step 6: Remove Grease and Sticky Residue
Light switches in kitchens are exposed to cooking oils, steam, and airborne grease. Over time, they may become sticky or develop a dull appearance.
The safe way to clean light switches in kitchens is to use a microfiber cloth dampened with warm water and a few drops of mild dish soap.
Follow These Steps
- Wipe away grease using gentle circular motions.
- Remove any soap residue with a clean, damp microfiber cloth.
- Dry the switch immediately with a soft cloth.
Never soak the switch or allow water to drip behind the faceplate.
Step 7: Remove Yellow Stains from White Light Switches
White plastic light switches can become yellow over time due to sunlight, age, smoke, or accumulated dirt.
If normal cleaning doesn’t restore the original color, try these methods:
Method 1: Mild Dish Soap
For light discoloration:
- Mix warm water with a few drops of dish soap.
- Wipe gently with a microfiber cloth.
- Dry thoroughly.
Method 2: Rubbing Alcohol
For greasy stains:
- Apply rubbing alcohol to a microfiber cloth.
- Rub gently until the stain begins to fade.
Method 3: Magic Eraser
For stubborn marks:
- Slightly dampen the sponge.
- Rub very gently.
- Test first in an inconspicuous area.
Excessive scrubbing may dull glossy finishes.
Step 8: Clean Decorative and Smart Light Switches
Modern homes often include dimmer switches, touch-sensitive panels, or smart switches.
These require extra care because electronic components are more delicate.
When cleaning these devices:
- Use only a dry or barely damp microfiber cloth.
- Never spray cleaners directly.
- Avoid excessive pressure on touch-sensitive controls.
- Follow the manufacturer’s cleaning instructions whenever possible.
Knowing how to Clean Light Switches Safely also means recognizing that not all switch types should be cleaned the same way.
How to Disinfect Light Switches Properly
Many homeowners confuse cleaning with disinfecting. Cleaning removes visible dirt, while disinfecting helps reduce germs on frequently touched surfaces.
To How to Disinfect Light Switches correctly:
- Remove dust first.
- Wipe the surface clean.
- Apply rubbing alcohol to a microfiber cloth.
- Wipe every exposed surface.
- Allow the alcohol to air dry.
This method helps disinfect high-touch surfaces without exposing the electrical components to excess moisture.
Cleaning Different Types of Light Switches
Different materials require slightly different cleaning methods.
Plastic Light Switches
Plastic switches are the most common in homes.
Best cleaner:
- Mild dish soap
- Rubbing alcohol
- Microfiber cloth
Avoid abrasive powders that can scratch the surface.
Metal Switch Plates
Metal finishes require extra care.
Recommended cleaners:
- Damp microfiber cloth
- Manufacturer-approved metal cleaner (if necessary)
Dry immediately to prevent water spots.
Painted Switch Plates
Painted switch covers can chip easily.
Use:
- Soft microfiber cloth
- Mild soap solution
Never use abrasive pads.
Glass Light Switch Panels
Glass switch plates look elegant but show fingerprints quickly.
Clean using:
- Alcohol-based glass cleaner sprayed onto a microfiber cloth
- Soft polishing cloth
Avoid spraying cleaner directly onto the panel.
Common Mistakes to Avoid
Many homeowners accidentally shorten the lifespan of their switches by using unsafe cleaning methods.
Avoid these mistakes when practicing How to Clean Light Switches Safely.
Spraying Cleaner Directly onto the Switch
This is the biggest mistake.
Liquid can seep inside and damage electrical components.
Always spray the cloth instead.
Using Too Much Water
A dripping cloth creates unnecessary risk.
Microfiber should be only slightly damp.
Ignoring Electrical Damage
Never clean switches showing:
- Burn marks
- Sparks
- Cracks
- Loose covers
- Buzzing sounds
Replace damaged switches immediately.
Using Harsh Chemicals
Avoid:
- Bleach
- Ammonia
- Acetone
- Abrasive powders
- Steel wool
These products can discolor or scratch switch plates.
Skipping Weekly Cleaning
The longer fingerprints, grease, and dust remain, the harder they become to remove.
Weekly maintenance is much easier than occasional deep cleaning.
Professional Housekeeping Tips
Professional cleaners know that consistency is more important than aggressive scrubbing.
Here are some expert recommendations from True Housekeeping.
Use Microfiber Every Time
Microfiber traps dust and dirt instead of pushing it around.
Keep One Cloth for Electronics
Dedicate one microfiber cloth only to electrical fixtures to avoid cross-contamination from kitchen grease or bathroom cleaners.
Include Switches in Every Cleaning Routine
Whenever you clean:
- Doors
- Door handles
- Baseboards
- Walls
Clean your light switches as well.
This creates a complete home cleaning routine.
Disinfect During Flu Season
During periods of illness, increase cleaning frequency for:
- Light switches
- Door handles
- Cabinet pulls
- Appliance handles
- Remote controls
These are some of the most frequently touched surfaces in the home.
Replace Old Switch Plates
Sometimes cleaning isn’t enough.
If a switch plate is cracked, permanently stained, or yellowed with age, replacing it is an inexpensive way to refresh your home’s appearance.
How Often Should You Clean Light Switches?
Cleaning frequency depends on your household size and lifestyle.
| Area | Recommended Frequency |
| Bedrooms | Once a week |
| Living Room | Once a week |
| Kitchen | 2–3 times per week |
| Bathroom | 2–3 times per week |
| Children’s Rooms | Several times each week |
| Entryway | Weekly |
| During Cold & Flu Season | Daily or every other day |
Homes with young children, pets, or frequent visitors should disinfect switches more often because they are high-touch surfaces.
Signs Your Light Switches Need Cleaning
Your light switches may need attention if you notice:
- Fingerprints and smudges
- Sticky residue
- Dust buildup
- Yellow discoloration
- Greasy spots
- Dark marks around the switch
- Dull appearance
- Visible grime near the edges
Cleaning these signs early makes the job easier and helps maintain a cleaner-looking home.
Why Regular Light Switch Cleaning Matters
A clean light switch may seem like a small detail, but it contributes to a healthier home. Regular maintenance reduces the buildup of dirt, skin oils, and bacteria while keeping your walls and fixtures looking fresh.
When you know how to Clean Light Switches Safely, you can confidently include this task in your weekly housekeeping routine without worrying about damaging electrical components. Consistent care also extends the life of your switch plates and creates a cleaner environment for everyone in your household.
Aapke article ka Part 3 neeche diya gaya hai.
Final Expert Tips for Safe Light Switch Cleaning
Cleaning light switches only takes a few minutes, but following the right techniques can help protect both your home and your family. Before you finish, keep these expert recommendations in mind.
- Always use a clean microfiber cloth to avoid spreading dirt.
- Never spray cleaning products directly onto a light switch.
- Use rubbing alcohol sparingly because it evaporates quickly and leaves little moisture behind.
- Wash your microfiber cloths after each cleaning session.
- Include light switches in your weekly housekeeping checklist.
- Clean switches after hosting guests or when someone in your home has been sick.
- Replace damaged or cracked switch plates instead of trying to repair them.
- Keep children from handling cleaning chemicals during the process.
- If a switch feels warm, sparks, or makes unusual noises, stop using it and have it inspected by a qualified electrician.
At True Housekeeping, we recommend making light switch cleaning part of your regular home maintenance routine rather than waiting until visible dirt appears.
Weekly Light Switch Cleaning Checklist
Follow this checklist to keep your switches clean and hygienic all year.
Weekly
✔ Dust all light switches with a dry microfiber cloth.
✔ Remove fingerprints and smudges.
✔ Wipe kitchen and bathroom switches with rubbing alcohol.
✔ Check for cracks or loose switch plates.
Monthly
✔ Deep clean every light switch.
✔ Clean around the edges with cotton swabs.
✔ Inspect for discoloration.
✔ Tighten loose faceplates if necessary.
Every 3–6 Months
✔ Remove switch plates (after turning off power).
✔ Clean behind the faceplate.
✔ Inspect wiring for visible damage (do not touch electrical wiring).
✔ Replace worn or yellowed switch covers if needed.
Common Questions About Light Switch Cleaning
Many homeowners have concerns about electrical safety. These answers address the most common questions people ask before cleaning light switches.
Can I use disinfecting wipes on light switches?
Yes. Slightly damp disinfecting wipes can be used on the outside of the switch plate. Avoid overly wet wipes and never allow liquid to seep inside the switch.
Is rubbing alcohol safe for light switches?
Yes. A microfiber cloth lightly dampened with 70% isopropyl rubbing alcohol is one of the safest ways to disinfect light switches because it evaporates quickly.
Should I turn off the electricity before cleaning?
For routine surface cleaning, it is usually sufficient to use a barely damp cloth. However, if you plan to remove the switch plate or clean around electrical components, turn off the power at the circuit breaker first.
Can I spray disinfectant directly on the switch?
No.
This is one of the most common mistakes homeowners make.
Always spray the cleaner onto a microfiber cloth first.
How often should light switches be disinfected?
Most homes should disinfect switches once each week.
Kitchen, bathroom, and entryway switches may need cleaning several times each week because they are touched more frequently.
Can vinegar be used to clean light switches?
A diluted vinegar solution may remove light dirt, but rubbing alcohol is generally a better option for disinfecting because it evaporates more quickly. Never use excessive liquid on electrical fixtures.
How do I remove greasy fingerprints from light switches?
Use a microfiber cloth lightly dampened with warm water and a drop of mild dish soap. Wipe the surface, then dry it immediately with a clean cloth.
Can I clean smart light switches the same way?
Yes, but be extra gentle. Use a dry or barely damp microfiber cloth and avoid pressing too hard on touch-sensitive controls. Follow the manufacturer’s care instructions whenever available.
Why do white light switches turn yellow?
White plastic switches may yellow because of UV exposure, age, cigarette smoke, cooking grease, or accumulated dirt. Regular cleaning helps maintain their appearance, but severe discoloration may require replacement.
What should I do if a light switch sparks?
Stop using the switch immediately and contact a licensed electrician. Do not continue cleaning or operating a switch that shows signs of electrical failure.
Conclusion
Learning how to Clean Light Switches Safely is one of the easiest ways to improve your home’s cleanliness while protecting your family’s health. Because light switches are among the most frequently touched surfaces in every home, regular cleaning helps reduce dust, fingerprints, grease, and everyday germs.
By following the safe cleaning methods in this guide, using microfiber cloths, applying cleaners correctly, and avoiding excessive moisture, you can keep your switches looking like new without risking damage to electrical components.
At True Housekeeping, we believe that consistent maintenance is always easier than dealing with heavy buildup later. Adding light switch cleaning to your weekly housekeeping routine takes only a few minutes but makes a noticeable difference in the overall cleanliness and appearance of your home.
If you found this guide helpful, explore more expert home cleaning tutorials on True Housekeeping to keep every room in your home fresh, organized, and spotless throughout the year.
Written by Farheen Gull
Published on True Housekeeping




Leave a Reply