
A washing machine cleans your clothes every week, but have you ever thought about who cleans the washing machine itself? Over time, detergent residue, fabric softener, dirt, hair, and moisture can build up inside the drum, detergent drawer, rubber seal, and filter. This buildup can leave your washer smelling unpleasant and may even transfer odors to freshly washed clothes.
Learning how to clean a washing machine properly doesn’t have to be difficult. With a few basic household supplies and a simple cleaning routine, you can keep your washer fresh, clean, and ready for your next load.
In this guide, you’ll learn 7 easy steps to clean a washing machine, including how to clean the drum, detergent dispenser, rubber door seal, filter, and exterior. We’ll also cover how to remove unpleasant odors and how to keep your washing machine cleaner for longer.
How to clean a washing machine?
Although your washing machine constantly comes into contact with water and laundry detergent, it doesn’t automatically clean itself. Small amounts of dirt and residue can remain behind after every cycle.
Over time, this buildup can become more noticeable, especially if you regularly wash heavily soiled clothes or use cold-water cycles.
A dirty washing machine may develop:
- Musty or unpleasant odors
- Soap and detergent buildup
- Mold or mildew around the rubber seal
- Residue inside the detergent drawer
- Dirt around the door or lid
- Clogged filters
- Poor drainage
- Clothes that don’t smell as fresh after washing
Regular cleaning helps prevent these problems and keeps your washing machine working efficiently.
How Often Should You Clean a Washing Machine?
For most households, cleaning the washing machine once a month is a good starting point.
However, you may need to clean it more often if:
- You wash laundry every day.
- You frequently use cold-water cycles.
- You regularly wash muddy or heavily soiled clothes.
- Your washer develops a musty smell.
- You notice mold around the door seal.
- You leave wet clothes inside the machine for several hours.
- You use a lot of detergent or fabric softener.
If your washing machine looks clean but has started to smell, don’t ignore it. Odor often means that residue or moisture is trapped somewhere inside the machine.
Signs Your Washing Machine Needs Cleaning
Not sure whether your washer needs attention? Look for these common warning signs.
1. Your Washing Machine Smells Bad
A musty, sour, or unpleasant smell is one of the most obvious signs that your washing machine needs cleaning.
Moisture combined with detergent residue can create an ideal environment for unpleasant buildup.
2. Clothes Smell After Washing
If your clothes come out of the washer smelling less fresh than they did before washing, the problem may not be your laundry detergent. The washing machine itself could be contributing to the odor.
3. You See Mold Around the Door Seal
Front-load washing machines have a rubber gasket around the door. Water, hair, lint, and detergent residue can collect in its folds.
Dark spots or slimy residue around the gasket are signs that it needs a thorough cleaning.
4. The Detergent Drawer Has Buildup
Detergent and fabric softener can leave a sticky residue inside the dispenser. If the drawer looks dirty or doesn’t slide smoothly, remove it and clean it.
5. Water Doesn’t Drain Properly
A partially blocked filter or drain area can cause water to drain slowly. Always check your washing machine’s manual before cleaning or removing any filter.
What You Need to Clean a Washing Machine
You don’t need a large collection of cleaning products.
Gather:
- Microfiber cloth
- Old toothbrush or small soft brush
- Warm water
- Mild dish soap
- White vinegar, if recommended for your machine
- Baking soda, if appropriate for your machine
- Clean towel
- Small bowl or container
Important Safety Note
Before cleaning any part of your washing machine, switch it off and unplug it when appropriate, especially before accessing areas such as the filter.
Also, never mix vinegar with chlorine bleach or other cleaning chemicals. Dangerous fumes can result.
Always check your washing machine manufacturer’s instructions before using vinegar, baking soda, commercial washing-machine cleaners, or accessing internal components.
Step 1: Clean the Washing Machine Drum
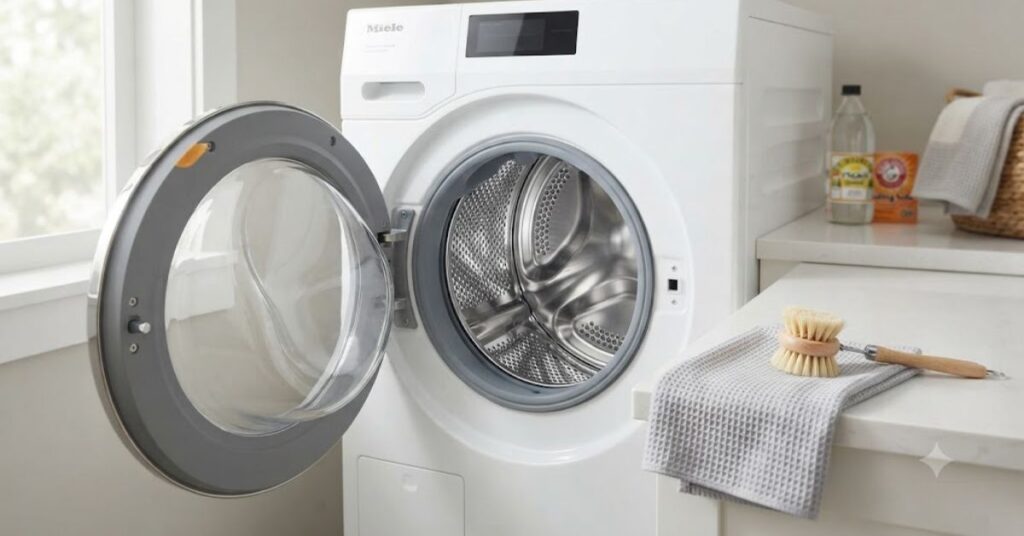
The drum is the main part of the washer where your clothes are cleaned, so it’s a good place to begin.
Even though the drum looks clean, detergent residue, minerals, dirt, and odors can accumulate over time.
Start With an Empty Washer
Remove all clothing from the washing machine.
Check inside the drum for:
- Socks
- Lint
- Hair
- Paper
- Small objects
- Any forgotten clothing
The washer should be empty before you run a cleaning cycle.
Wipe the Inside
Take a clean microfiber cloth and wipe the inside of the drum.
Pay particular attention to areas where dirt or residue may collect, including the edges around the opening.
If you notice visible grime, use warm water and a small amount of mild dish soap on the cloth. Wipe the area thoroughly afterward with clean water.
Run the Washer’s Cleaning Cycle
If your washing machine has a Tub Clean, Drum Clean, Self Clean, or similar cycle, use it according to the manufacturer’s instructions.
These cycles are specifically designed to clean the inside of the machine.
If your washer doesn’t have a dedicated cleaning cycle, use the hottest appropriate empty cycle according to the manufacturer’s recommendations.
A washing-machine cleaner designed for your appliance can also be used according to its label instructions.
Why the Drum Needs Regular Cleaning
A clean drum can help prevent old detergent and dirt residue from becoming a source of unpleasant odors.
However, cleaning the drum alone isn’t enough. Other parts of the machine can collect residue too.
That’s why the next steps focus on the detergent drawer, rubber seal, filter, and exterior.
Before Moving to the Next Step
Take a quick look inside your washing machine after the cleaning cycle.
If you notice leftover residue, wipe it away with a microfiber cloth.
Don’t immediately close the door or lid after cleaning. Allow the interior to dry properly.
Step 2: Clean the Detergent Drawer
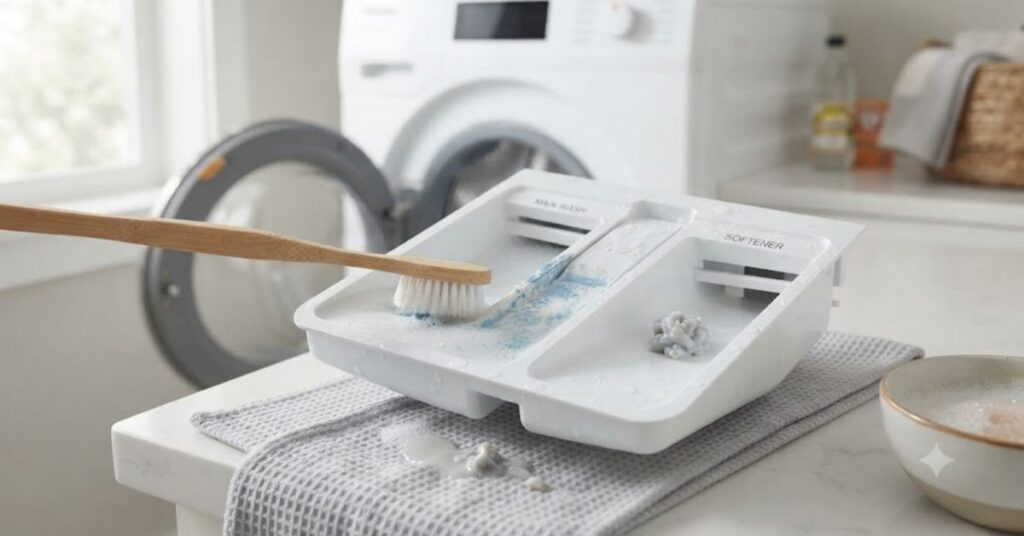
The detergent drawer is one of the easiest parts of a washing machine to overlook. However, detergent, fabric softener, and water can leave behind sticky residue that eventually becomes dirty and unpleasant.
A dirty dispenser can also prevent detergent from flowing properly into the washing machine.
Remove the Detergent Drawer
If your washing machine has a removable detergent drawer, gently pull it out.
Some drawers have a small release button or tab that you need to press before they can be completely removed. Check your appliance manual if you’re unsure how to remove it.
Don’t force the drawer because the plastic parts can break.
Soak the Drawer
Place the drawer in a sink or basin filled with warm water.
Let it soak for several minutes to soften dried detergent and fabric-softener residue.
For stubborn buildup, use a small amount of mild dish soap and a soft brush.
Scrub the Compartments
Use an old toothbrush or small soft brush to clean:
- Detergent compartments
- Fabric softener section
- Small corners
- Water openings
- Edges and grooves
Pay special attention to areas where dried detergent has accumulated.
Rinse the drawer thoroughly with clean water.
Clean the Drawer Opening
Don’t put the clean drawer back immediately.
Use a damp microfiber cloth to wipe the inside of the drawer compartment. If there is visible buildup, gently remove it with a soft brush.
Avoid pouring large amounts of water directly into the machine.
Dry and Replace the Drawer
Dry the drawer with a clean towel or allow it to air-dry completely.
Once everything is clean and dry, put the drawer back into its original position.
Tip: Leave the detergent drawer slightly open between washes when possible. Better airflow can help the area dry and reduce residue buildup.
Step 3: Clean the Rubber Door Seal
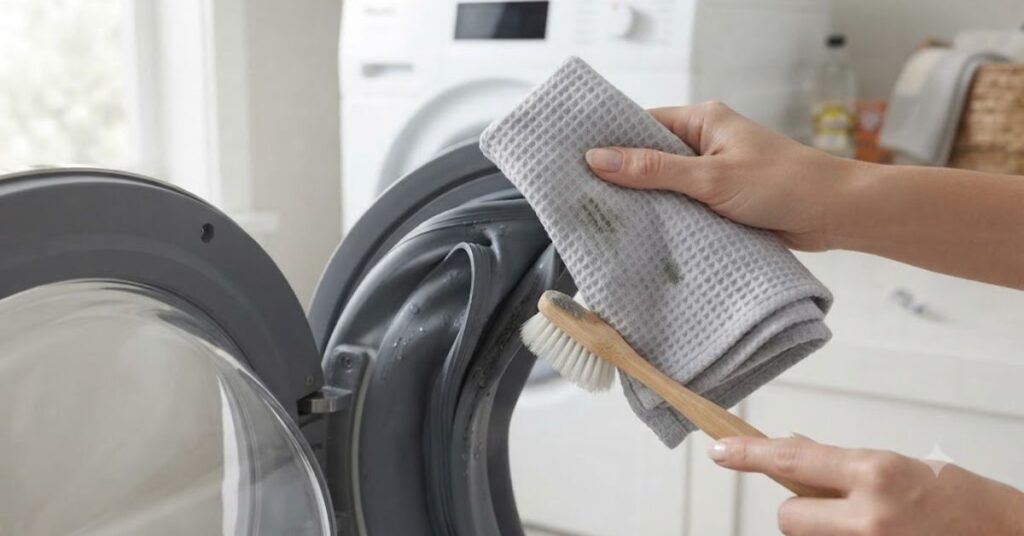
If you have a front-load washing machine, the rubber door gasket deserves special attention.
The folds of the gasket can trap:
- Water
- Hair
- Lint
- Dirt
- Detergent residue
- Small pieces of fabric
Because this area can remain damp after a wash, it may develop unpleasant odors or mildew-like buildup.
Open the Door
Open the washing machine door and gently pull back the rubber seal.
Don’t pull aggressively or stretch the gasket unnecessarily.
Remove Trapped Dirt
Check inside the folds of the rubber seal.
Remove visible:
- Hair
- Lint
- Tissue
- Dirt
- Small objects
Use a dry microfiber cloth first if there is loose debris.
Wipe the Gasket
Mix warm water with a small amount of mild dish soap.
Dip a microfiber cloth into the solution and wring it out well.
Wipe the entire gasket, including the folds and the area around the door opening.
For small areas, a soft toothbrush can help loosen stubborn residue.
Rinse the Seal
After cleaning, wipe the rubber gasket again with a clean, damp cloth to remove soap residue.
Then dry it thoroughly with a clean towel.
Don’t Forget the Glass Door
While you’re cleaning the gasket, wipe the inside and outside of the washing-machine door.
Soap residue, water spots, and dirt can collect around the glass and door frame.
A clean door also makes it easier to spot any buildup that needs attention.
Keep the Door Dry
After each laundry cycle, wipe away excess moisture from the rubber seal.
When the manufacturer allows it, leave the washer door slightly open between loads so the interior can dry.
This simple habit can make a big difference in preventing musty odors.
Step 4: Clean the Washing Machine Filter
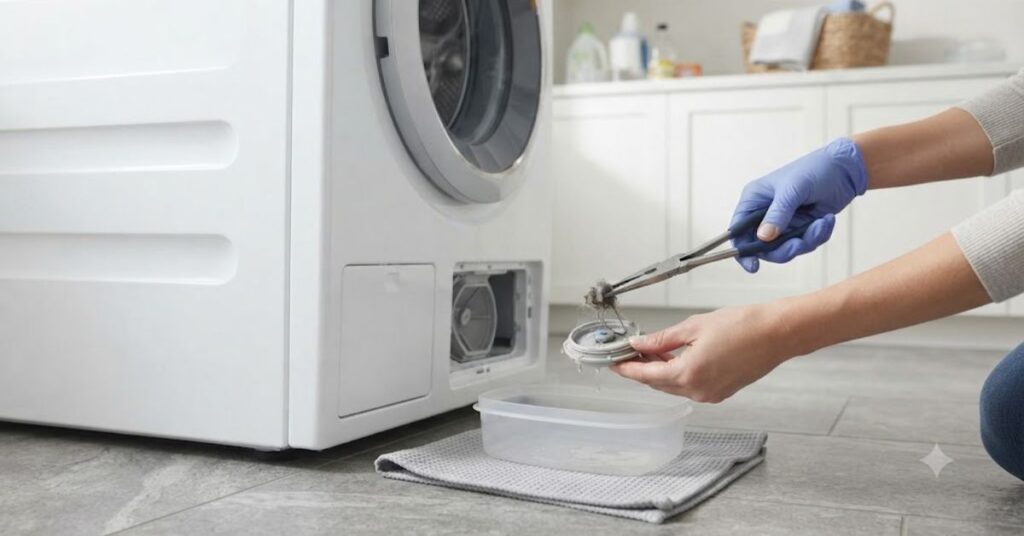
The filter is another important part of your washing machine cleaning routine.
Depending on your model, the filter may collect lint, hair, coins, buttons, and other small debris.
A clogged filter can contribute to drainage problems and unpleasant smells.
Check Your Washing Machine Manual First
The location and cleaning procedure for the filter vary between washing-machine models.
Some machines have an easily accessible pump filter, while others may use a different system.
Before opening or removing anything, consult the manufacturer’s instructions.
Prepare for Water
If your machine has an accessible drain or pump filter, some water may come out when you open it.
Place an old towel and a shallow container underneath the area if your manufacturer’s instructions recommend doing so.
Remove the Debris
Following the manufacturer’s instructions, carefully remove the filter.
Clear away any visible debris such as:
- Lint
- Hair
- Coins
- Buttons
- Small fabric pieces
Never reach into an area that you cannot safely access.
Rinse the Filter
If the manufacturer allows the filter to be rinsed, clean it under warm running water.
Use a soft brush if necessary to remove stubborn residue.
Avoid damaging delicate parts of the filter.
Reinstall It Correctly
After cleaning, reinstall the filter securely according to the manufacturer’s instructions.
A loose filter can cause leaks or other problems.
If you’re unsure how to access or clean your particular filter, don’t guess. Check the appliance manual or contact the manufacturer.
Step 5: Clean the Washing Machine Exterior
Once you’ve cleaned the important internal areas, don’t forget about the outside.
The exterior can collect:
- Dust
- Detergent splashes
- Water spots
- Fingerprints
- Dirt
Fortunately, cleaning it takes only a few minutes.
Wipe the Control Panel
Use a soft, slightly damp microfiber cloth to wipe the control panel.
Avoid spraying cleaner directly onto buttons, displays, switches, or electrical components.
Instead, apply an appropriate cleaner to the cloth if your appliance manufacturer permits it.
Clean the Top and Sides
Wipe the top, sides, and front of the machine.
For sticky detergent residue, use warm water and a small amount of mild dish soap.
Then wipe the surface with a clean damp cloth.
Dry the Surface
Finish with a dry microfiber cloth.
Drying the exterior helps prevent water spots and keeps your washing machine looking cleaner.
A Quick Washing Machine Cleaning Checklist
Use this simple checklist once a month:
- ☐ Empty the washing machine
- ☐ Clean the drum
- ☐ Run the appropriate cleaning cycle
- ☐ Wash the detergent drawer
- ☐ Clean the rubber door seal
- ☐ Check the filter according to the manual
- ☐ Wipe the door and exterior
- ☐ Leave the machine open to dry when appropriate
Regular maintenance doesn’t have to take a lot of time. A few minutes of cleaning each month can help prevent bigger buildup later.
What About a Top-Load Washing Machine?
The basic cleaning principles are similar, but the design is different.
Top-load machines usually don’t have the same front rubber gasket found on many front-load models. Instead, pay attention to:
- The inside of the lid
- Under the lid
- Agitator or impeller area
- Detergent dispenser
- Fabric softener dispenser
- Tub
- Lint filter, if equipped
- Exterior surfaces
Always follow the cleaning instructions for your specific model.
How Long Does It Take to Clean a Washing Machine?
A basic maintenance clean can take around 15–30 minutes of hands-on work, depending on the condition of the machine.
The actual cleaning cycle may take considerably longer because the machine does most of the work.
If your washer has significant buildup, you may need extra time to clean the detergent drawer, gasket, and other accessible areas.
Keep Your Washing Machine Fresh Between Deep Cleanings
Cleaning your washer once a month is helpful, but daily habits matter too.
After each load:
- Remove laundry promptly.
- Check the rubber seal for trapped items.
- Wipe away visible moisture.
- Leave the door or lid open when appropriate.
- Keep the detergent drawer slightly open if possible.
- Use the recommended amount of detergent.
- Avoid overloading the washer.
These small habits can reduce moisture and residue buildup between cleaning sessions.
Step 6: Remove Bad Smells From the Washing Machine
If your washing machine has a musty or unpleasant smell, simply wiping the outside won’t solve the problem. Odors can come from trapped moisture, detergent residue, dirty seals, the dispenser, or other areas of the machine.
Start by cleaning the accessible areas described in the previous steps. Then run the appropriate cleaning cycle recommended by your washing machine manufacturer.
Use a Washing Machine Cleaner
A commercial washing-machine cleaner can be a convenient option for removing residue and odors.
Choose a product that is compatible with your washing machine and follow the instructions on the package.
Don’t use more product than recommended. More cleaner isn’t necessarily better.
Can You Use Vinegar to Clean a Washing Machine?
White vinegar is commonly suggested as a household cleaning ingredient, but you should check your washing machine manufacturer’s instructions before using it.
Some manufacturers advise against using vinegar because repeated exposure to acidic substances may affect certain rubber or other components.
If your manufacturer permits vinegar, use only the amount recommended by the manufacturer or appliance-care instructions.
Never mix vinegar with chlorine bleach or other cleaning chemicals.
What About Baking Soda?
Baking soda is another popular household cleaning ingredient.
However, the safest approach is to follow your washing machine manufacturer’s cleaning recommendations rather than combining multiple cleaning products.
If you use baking soda, don’t mix it with bleach, vinegar, or other cleaners.
Dry the Washer Thoroughly
After cleaning, allow the washing machine to dry properly.
Wipe excess water from:
- The rubber gasket
- Door area
- Drum opening
- Detergent drawer
- Accessible moisture-prone areas
When appropriate, leave the door or lid open to allow air to circulate.
Step 7: Run a Final Cleaning Cycle
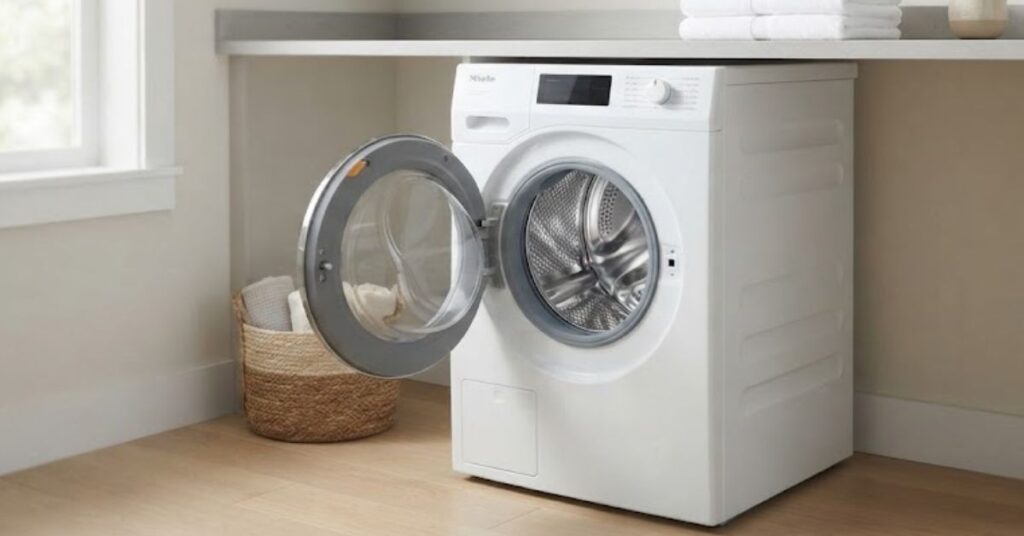
The final step is to run an appropriate empty cleaning cycle.
If your washing machine has a Tub Clean, Drum Clean, Self Clean, or similar setting, use it according to the manufacturer’s instructions.
If there is no dedicated cleaning cycle, follow the appliance manual for the recommended empty-cycle procedure.
Why Run an Empty Cycle?
An empty cleaning cycle helps flush away loosened residue after you’ve cleaned the accessible parts of the washer.
It also allows you to check whether:
- The washer drains properly
- Unusual odors remain
- Visible residue is still present
- The machine operates normally
Once the cycle is complete, inspect the inside of the drum.
If you see remaining residue, wipe it away with a clean microfiber cloth.
How to Keep Your Washing Machine Clean Longer
Deep cleaning your washing machine once a month is useful, but simple habits between cleanings can make an even bigger difference.
1. Remove Clothes Promptly
Take wet clothes out of the washing machine soon after the cycle ends.
Leaving damp laundry inside for hours can contribute to unpleasant odors.
2. Keep the Door or Lid Open
When safe and appropriate for your appliance, leave the door or lid slightly open after washing.
This allows moisture to evaporate instead of remaining trapped inside.
If you have children or pets, make sure the open door doesn’t create a safety risk.
3. Don’t Use Excess Detergent
Using too much detergent can leave residue behind.
Always follow the detergent manufacturer’s recommendations and your washing machine’s instructions.
4. Clean the Detergent Drawer Regularly
Don’t wait until the dispenser becomes visibly dirty.
A quick rinse and wipe every few weeks can prevent stubborn buildup.
5. Check the Rubber Seal
For front-load washers, quickly inspect the rubber gasket after laundry day.
Remove lint, hair, or small objects and wipe away moisture.
6. Don’t Overload the Machine
Overloading can prevent clothes from moving freely and may interfere with proper cleaning and rinsing.
Follow the recommended load capacity for your washing machine.
7. Wash Extremely Dirty Items Carefully
If clothes contain large amounts of mud, sand, or debris, remove as much loose dirt as possible before putting them into the washing machine.
This reduces the amount of debris entering the appliance.
8. Clean the Filter as Recommended
If your washing machine has a user-cleanable filter, follow the manufacturer’s recommended cleaning schedule.
Never remove or access components that your manual doesn’t identify as user-serviceable.
How Often Should You Deep Clean a Washing Machine?
For many households, a monthly cleaning routine is a practical starting point.
However, the ideal frequency depends on how often you use the machine and the manufacturer’s recommendations.
You may need more frequent cleaning if:
- You wash several loads every day.
- You regularly wash heavily soiled clothing.
- The machine develops odors.
- You notice visible residue.
- The rubber seal becomes dirty.
- Your laundry no longer smells fresh after washing.
If your washing machine has a specific maintenance schedule, follow that schedule first.
Front-Load vs. Top-Load Washing Machine Cleaning
Both types of washing machines need regular maintenance, but some areas require different attention.
Front-Load Washing Machines
Focus on:
- Rubber door gasket
- Door glass
- Detergent drawer
- Drum
- Drain or pump filter, if user-serviceable
- Exterior
The rubber gasket deserves particular attention because moisture can remain trapped inside its folds.
Top-Load Washing Machines
Focus on:
- Tub
- Lid
- Agitator or impeller
- Detergent dispenser
- Fabric softener dispenser
- Lint filter, if equipped
- Exterior
Always follow your specific appliance manual because designs and cleaning procedures vary.
Common Washing Machine Cleaning Mistakes
Avoiding a few simple mistakes can make your cleaning routine safer and more effective.
Mistake 1: Mixing Cleaning Products
Never mix household cleaning chemicals unless the product manufacturer specifically says they can be combined.
In particular, never mix chlorine bleach with vinegar, ammonia, or other incompatible cleaners.
Mistake 2: Using Abrasive Scrubbers
Rough scouring pads can scratch certain surfaces.
Use soft microfiber cloths and soft brushes for routine cleaning.
Mistake 3: Pouring Cleaner Everywhere
Don’t randomly pour cleaning products into different parts of the washing machine.
Use only the correct compartment or method specified by the product and appliance manufacturer.
Mistake 4: Ignoring the Manual
Your washing machine may have special requirements for cleaning products, temperatures, filters, and maintenance cycles.
The manufacturer’s instructions should always take priority.
Mistake 5: Cleaning Only the Drum
The drum is important, but it isn’t the only place where residue can accumulate.
Remember to clean the dispenser, gasket, accessible filter, door, and exterior too.
Washing Machine Cleaning Checklist
Save this simple checklist for your monthly cleaning routine:
Monthly
- ☐ Empty the washer
- ☐ Clean the drum
- ☐ Run the recommended cleaning cycle
- ☐ Clean the detergent drawer
- ☐ Clean the fabric softener compartment
- ☐ Wipe the rubber gasket
- ☐ Check the accessible filter
- ☐ Clean the door
- ☐ Wipe the exterior
- ☐ Allow the washer to dry
After Every Wash
- ☐ Remove clothes promptly
- ☐ Check the gasket for trapped items
- ☐ Wipe excess moisture when needed
- ☐ Leave the door or lid open when appropriate
- ☐ Keep the detergent drawer slightly open if possible
Frequently Asked Questions
How often should I clean my washing machine?
For many homes, once a month is a good starting point. If you use your washing machine heavily or notice odors and residue, you may need to clean it more frequently.
Why does my washing machine smell bad?
A washing machine can develop odors because of trapped moisture, detergent residue, dirt, buildup, or poor drying between loads. Cleaning the drum, gasket, dispenser, and other accessible areas can help.
How do I stop my washing machine from smelling?
Remove wet laundry promptly, use the recommended amount of detergent, clean the washer regularly, and allow the door or lid to remain open when appropriate so moisture can escape.
Can I use vinegar to clean my washing machine?
It depends on the appliance. Some manufacturers recommend against vinegar because its acidity may affect certain components over time. Check your washing machine manual before using it.
Can I use baking soda in my washing machine?
Baking soda is commonly used for household cleaning, but you should follow your washing machine manufacturer’s recommendations before adding it to the appliance.
How do I clean a washing machine rubber seal?
Gently pull back the accessible folds of the rubber gasket and remove trapped hair, lint, and debris. Wipe it with a damp microfiber cloth and mild soap if appropriate, then rinse and dry thoroughly.
How do I clean a washing machine filter?
First, check your appliance manual because filter locations and cleaning procedures vary. If the filter is user-serviceable, follow the manufacturer’s instructions for safely removing, cleaning, and reinstalling it.
How can I prevent mold and mildew in my washing machine?
Keep moisture from remaining trapped inside the machine. Remove wet laundry promptly, wipe moisture from the gasket, clean detergent residue regularly, and leave the door or lid open when appropriate.
Should I clean my washing machine even if it looks clean?
Yes. Residue can build up in areas that aren’t immediately visible, such as detergent drawers, rubber seals, filters, and other moisture-prone areas.
Why do my clothes smell after washing?
The washing machine may have residue or odor buildup, but other factors can also contribute. Check the washer, detergent amount, laundry load size, and how quickly clothes are removed after the cycle.
Final Thoughts
Knowing how to clean a washing machine can help you maintain a fresher laundry area and prevent residue from building up over time.
The process doesn’t have to be complicated. Start with the drum, then clean the detergent drawer, rubber gasket, accessible filter, door, and exterior. Finally, run the appropriate cleaning cycle recommended by your appliance manufacturer.
The most important part is consistency. A quick maintenance routine after laundry and a more thorough cleaning about once a month can help keep your washer in better condition.
So, the next time you notice a musty smell or your freshly washed clothes don’t smell as fresh as expected, don’t immediately blame the detergent. Your washing machine may simply need a good cleaning.